Debugging with Arm Keil MDK
Introduction
Arm Keil MDK is the complete software development environment for a wide range of Arm Cortex-M based microcontroller devices. MDK includes the µVision IDE and debugger, Arm C/C++ compiler, and essential middleware components. It supports all silicon vendors with more than 6,000 devices and is easy to learn and use.
This guide explains how to configure the local debug toolchain using M.2 Dock with Arm Keil MDK.
Note
Due to the linker limits, this does not work in the free version of uVision. If you do not have a uVision license, you can use Eclipse or Visual Studio Code instead.
What you'll need
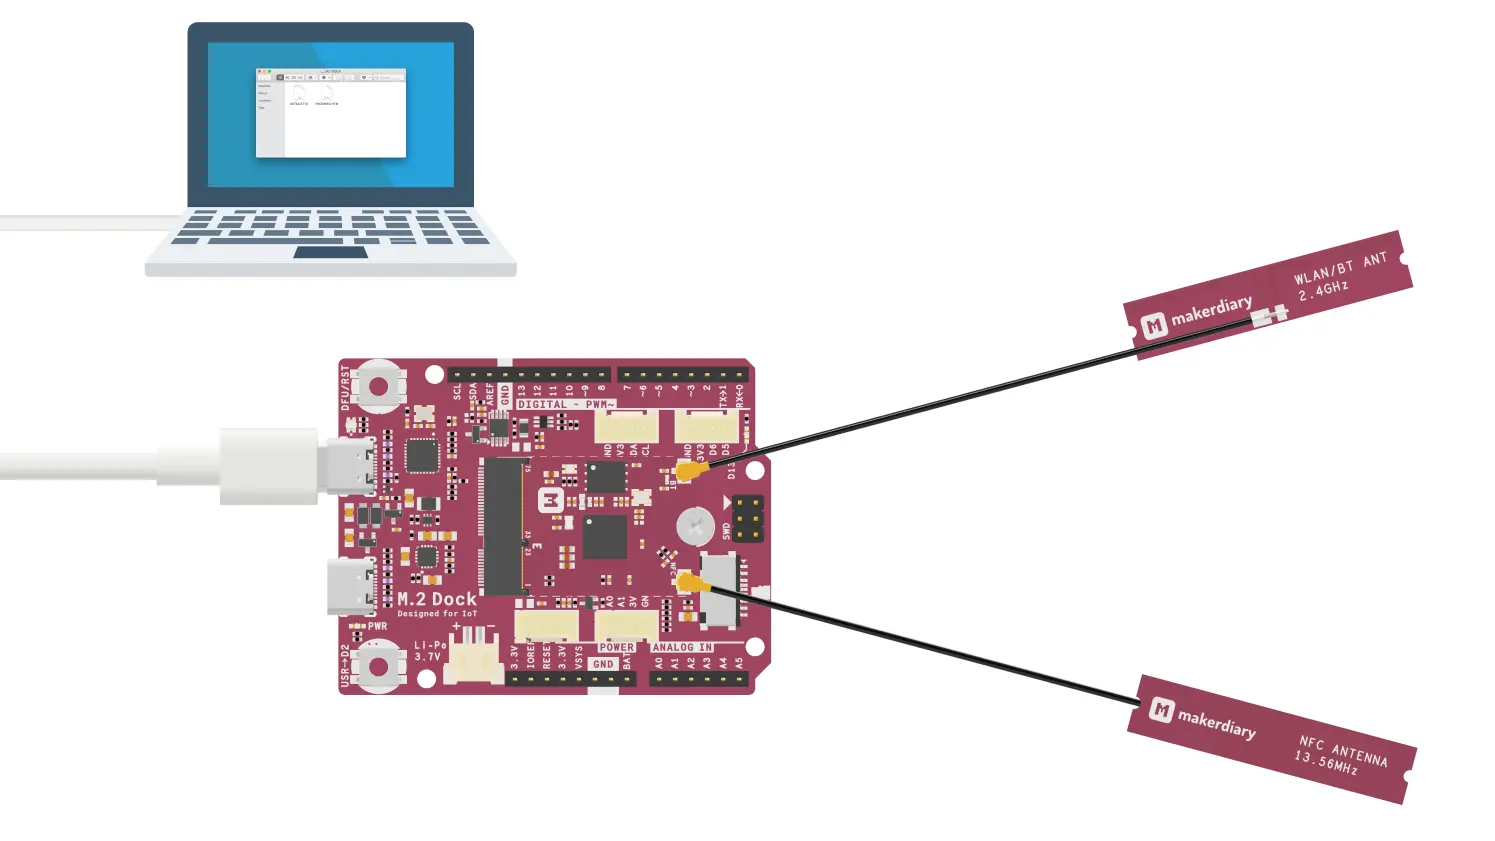
- A nRF52840 M.2 Developer Kit (including nRF52840 M.2 Module and M.2 Dock)
- ARM Keil MDK
Connecting the target
- Mount the nRF52840 M.2 Module
- Connect the Debugger USB port of M.2 Dock to your PC using the provided USB-C Cable
- A disk drive called M2-DOCK will be automatically detected by the computer.
Configuring the debugger
- Open your Keil MDK project.
-
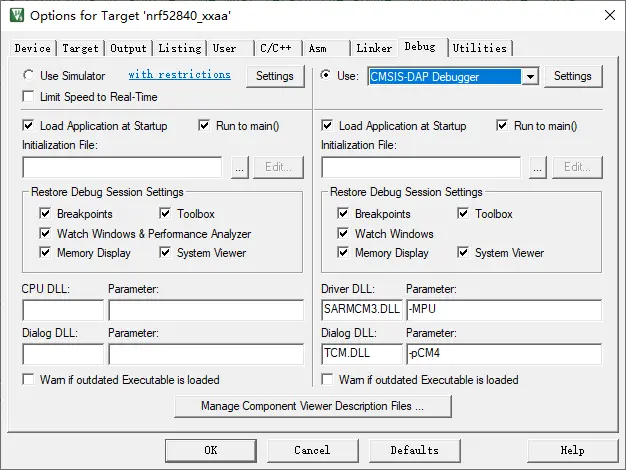
Go to Project -> Options for Target -> Debug, and select CMSIS-DAP Debugger from the drop-down menu.
-
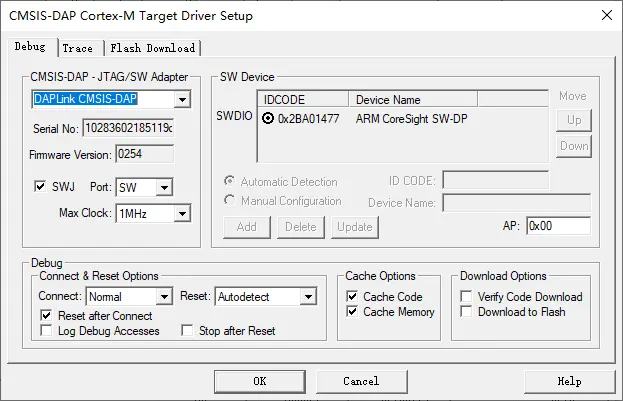
Click Settings button. In the next windows select the DAPLink CMSIS-DAP adapter. Set the SW mode. In the SW Device, you can view the target device.
-
Click OK to save the options.
Debugging your project
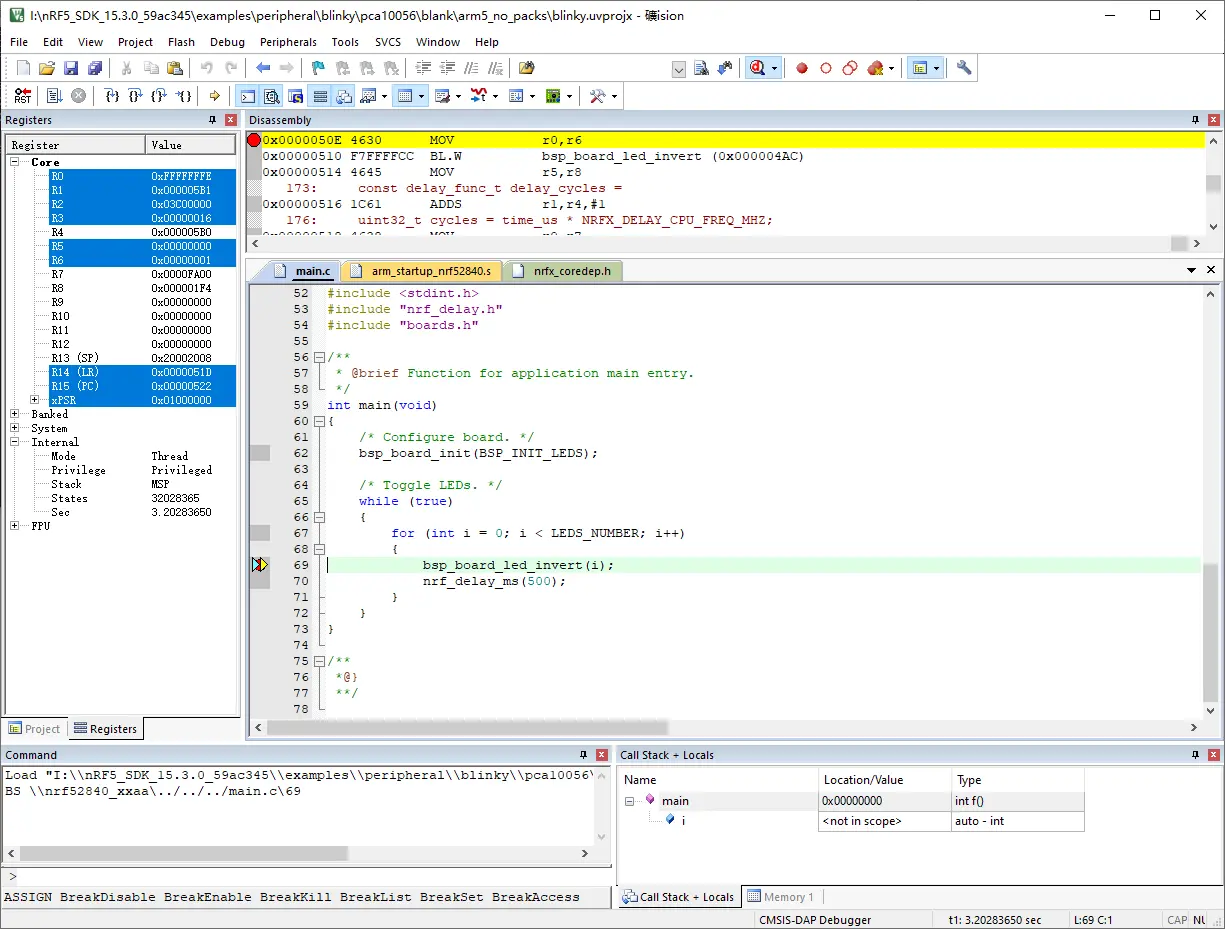
- Insert a Breakpoint in your code.
- Click the menu Debug -> Start/Stop Debug Session, and debugging starts.
- Now you can explore the debugging capabilities for Variables, Registers and more.
Create an Issue
Interested in contributing to this project? Want to report a bug? Feel free to click here: