Thread CoAP Client
Overview
This section of the documentation explains how to set up a basic OpenThread network composed of the Thread CoAP Client and Server:
- Thread CoAP Client demonstrates how to use Zephyr CoAP API for communication to access resources available on a Thread server node. The client supports Multiprotocol Bluetooth LE extension which uses the Nordic UART Service (NUS) library to control the LED states over Bluetooth® LE in a Thread network.
-
Thread CoAP Server demonstrates how to expose resources that can be accessed by other devices in the same Thread network. The following CoAP resources are exposed on the network by this sample:
/light- used to control LED0(Red)/provisioning- used to perform provisioning
After the Thread network is established, the client node can control the state of LED0(Red) on server nodes. It can turn on the LED either on every server node in the network with a multicast message, or on a single specific server node that is paired with the client node.
Sniffing packets from a Thread network
You can use nRF Sniffer for 802.15.4 to capture and analyze packets exchanged on a Thread network.
Requirements
Before you start, check that you have the required hardware and software:
- 2x nRF52840 MDK USB Dongle(or w/Case option)
- A smartphone or a tablet with nRF Toolbox installed
- A computer running macOS, Linux, or Windows 7 or newer
Building the sample
Before you start building, remember to set up the environment first.
Use the following steps to build the samples on the command line.
-
Open a terminal window.
-
Go to
my-workspace/ncs-playgrounddirectory created in the Setting up the environment section. -
Build each sample using the
westcommand, specifying the board (following the-boption) asdongle_nrf52840:Tip
The
-p alwaysoption forces a pristine build, and is recommended for new users. Users may also use the-p autooption, which will use heuristics to determine if a pristine build is required, such as when building another sample. -
After running the
west buildcommand, the build files can be found inbuild/zephyr.
Flashing the firmware
The samples are designed to work with the UF2 Bootloader, so that you can easily flash the sample using the UF2 Bootloader. The firmware can be found in build/zephyr with the name zephyr.uf2.
To flash the firmware, complete the following steps:
-
Push and hold the button and plug your dongle into the USB port of your computer. Release the button after your dongle is connected. The RGB LED turns green.
-
It will mount as a Mass Storage Device called UF2BOOT.
-
Drag and drop
zephyr.uf2onto the UF2BOOT volume. The RGB LED blinks red fast during flashing. -
Re-plug the dongle and the sample will start running.
-
Repeat the steps above to finish flashing the client and server board.
Testing
After flashing the firmware to your dongles, complete the following steps to test it:
- Turn on the dongle that runs the Thread CoAP Server sample. Wait until the server's RGB LED turns Blue. It will create a Thread network and this node becomes the Thread network Leader.
- Turn on the dongle that runs the Thread CoAP Client sample.
- Wait until the client's RGB LED turns Blue. The client enters the network as a Child, and gradually becomes a Router.
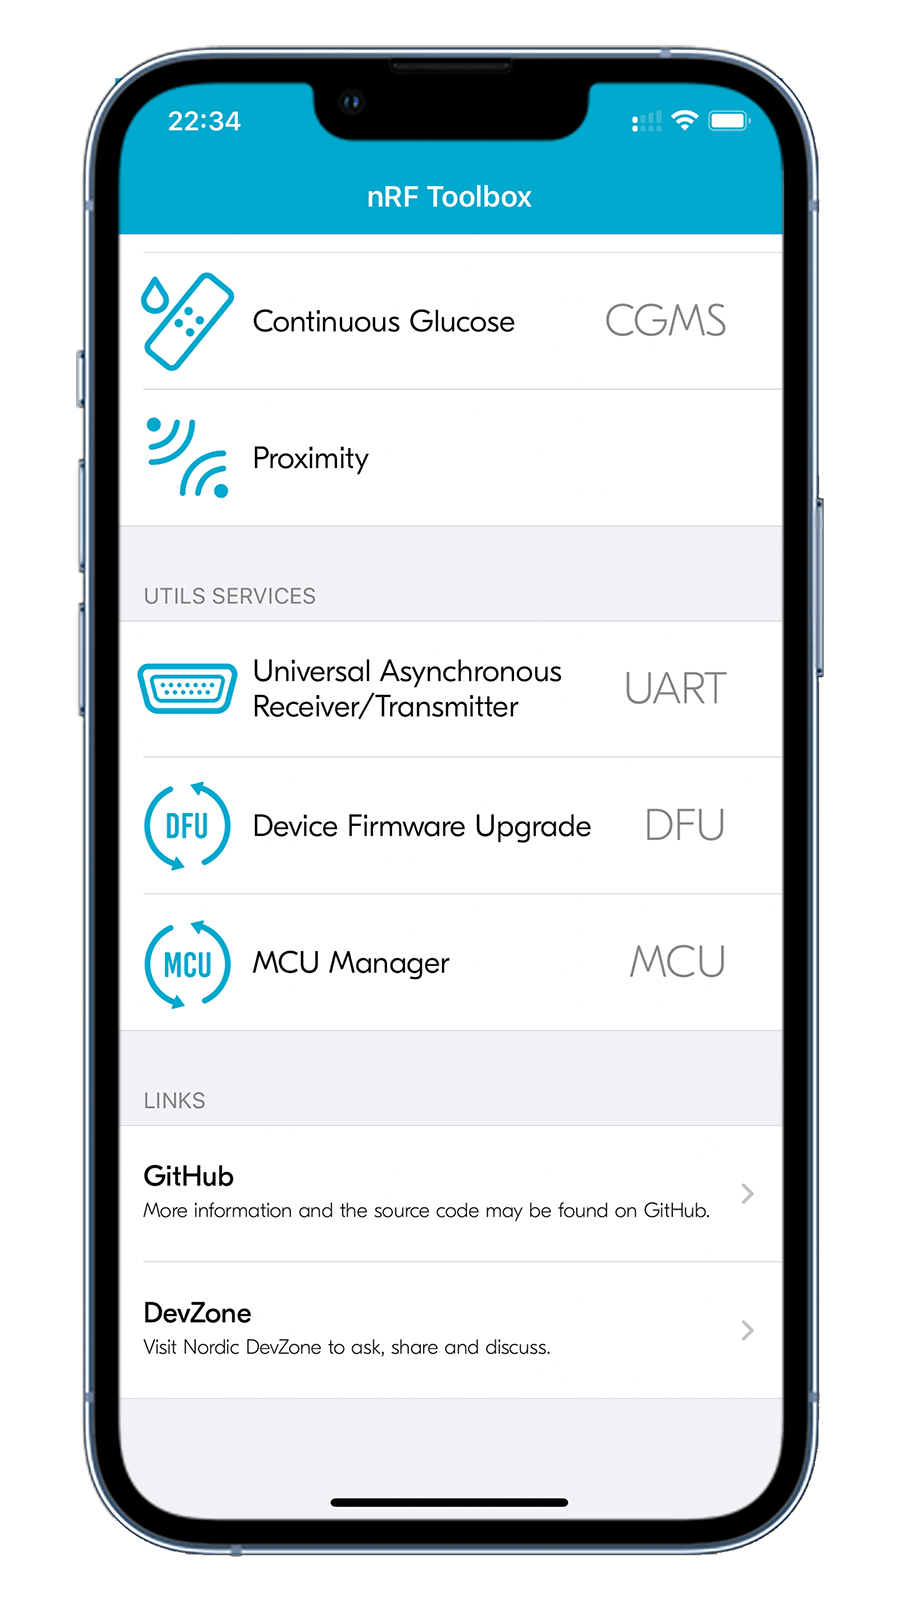
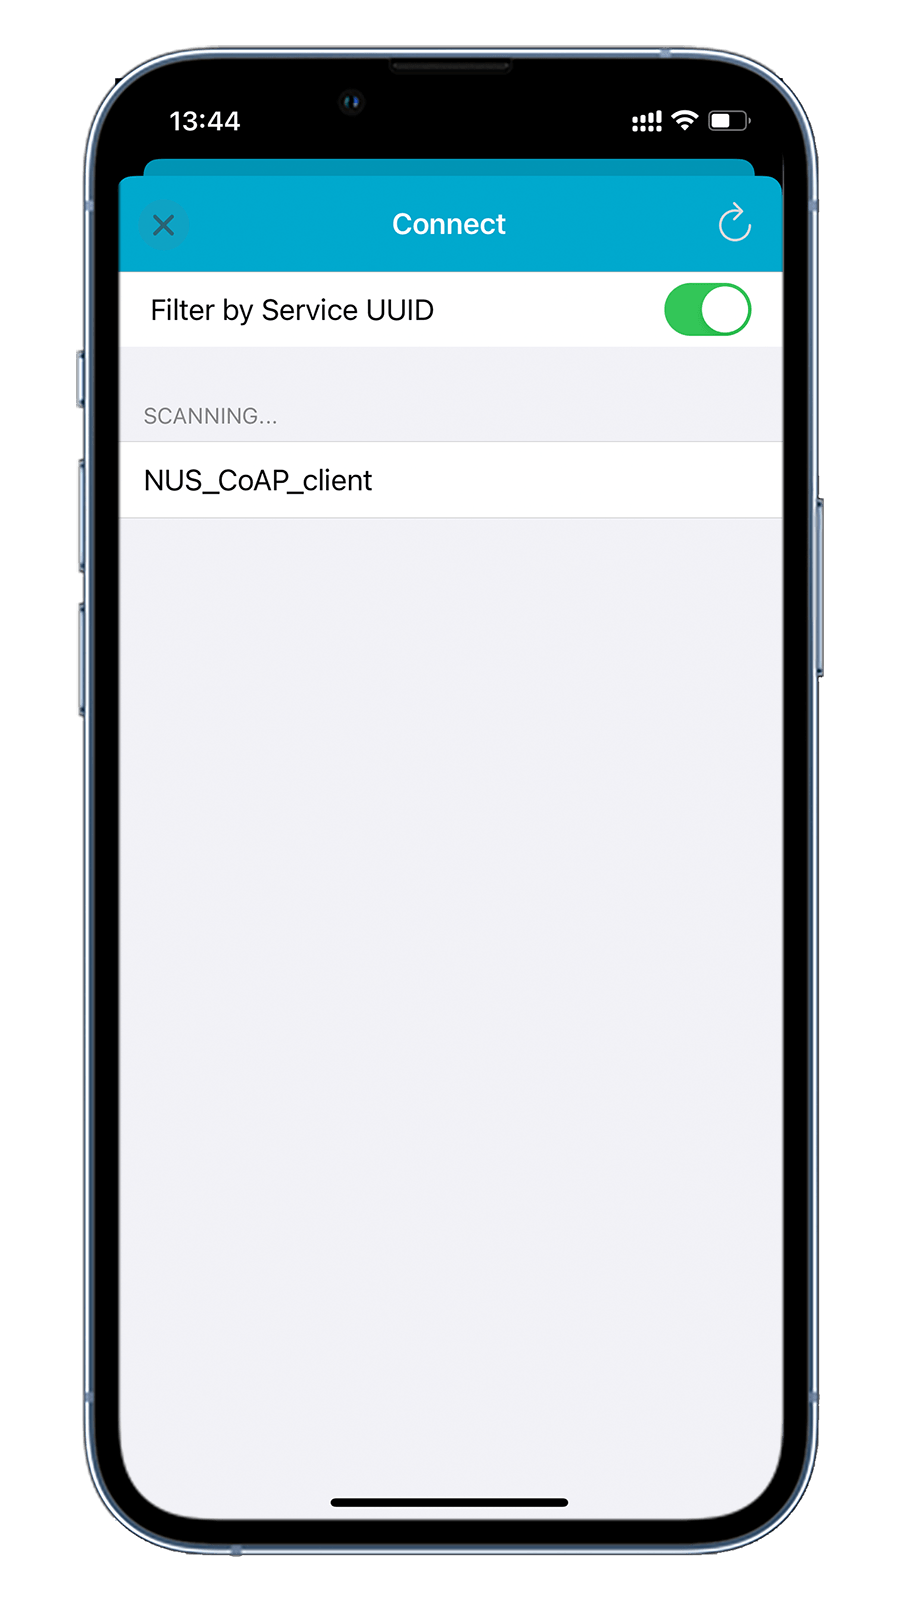
- Start the nRF Toolbox app, tap UART to open the UART application.
- Connect to the device with the name NUS_CoAP_client discovered in the UART application.
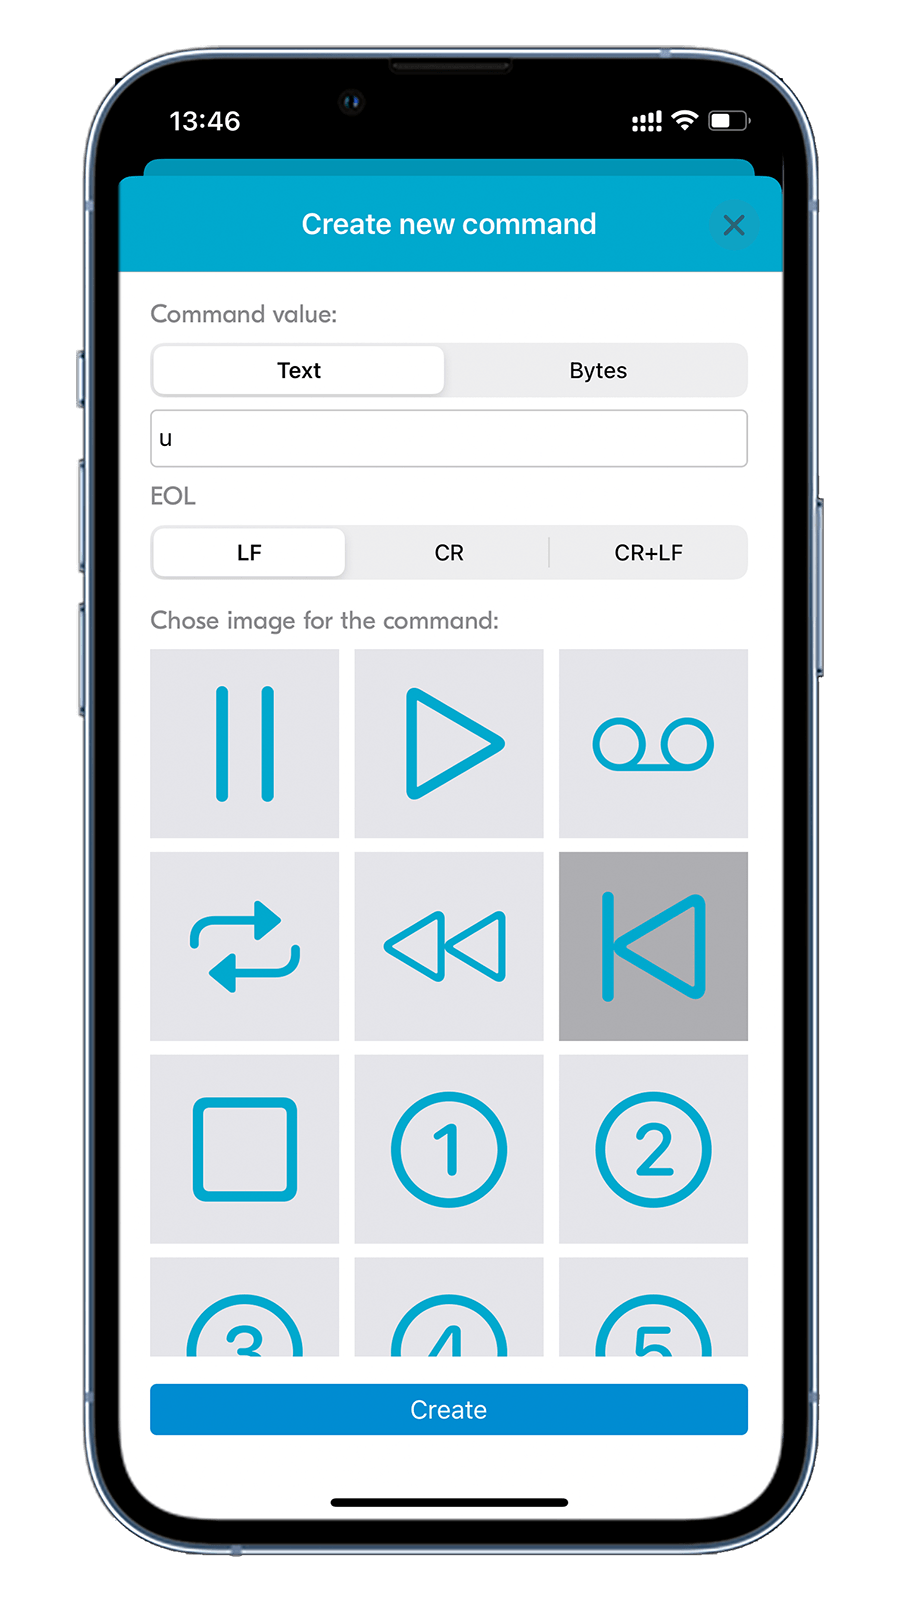
-
Tap the blank buttons to create new commands. The following command assignments are configured with EOL set to LF :
- u - Send a unicast CoAP message over Thread.
- m - Send a multicast CoAP message over Thread.
- p - Send a pairing request as CoAP message over Thread.
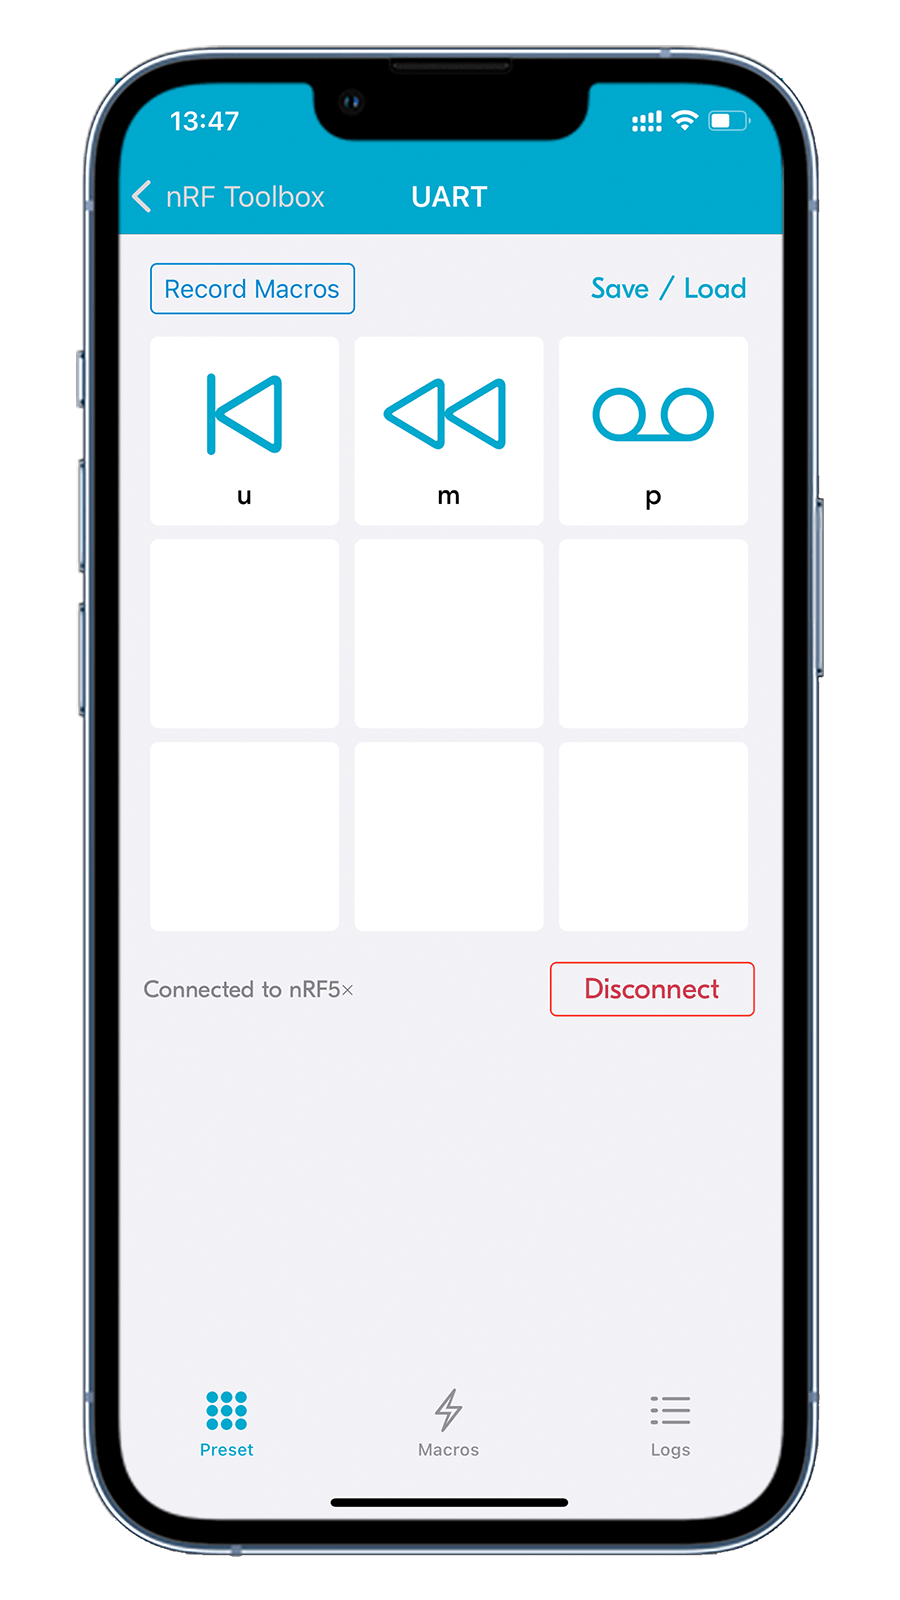
-
Tap the m command button to send a multicast
LIGHT_ONorLIGHT_OFFmessage (alternatively) to the/lightresource. Observe that the LED0(Red) on the server node turns on or off. -
Pair a client with a server by completing the following steps:
- Press the button on a server node to enable pairing.
- Tap the p command button to pair the client with the server node in the pairing mode.
-
Tap the u command button to send a unicast
LIGHT_TOGGLEmessage to the/lightresource on the paired server node.