Using DAPLink Firmware
One nRF52840 MDK USB Dongle can be used to program and debug another, using the DAPLink interface firmware, which creates a bridge between your development computer and the target's debug access port.
Requirements
Before you start, check that you have the required hardware and software:
- 2x nRF52840 MDK USB Dongle
- Several jumper wires
- A computer running macOS, Linux, or Windows 7 or newer
- Python 3.6.0 or later
- pyOCD - Python based tool and API for debugging, programming, and exploring Arm Cortex microcontrollers.
Programming the DAPLink firmware
You must program the DAPLink firmware onto a nRF52840 MDK USB Dongle to make it become a CMSIS-DAP debug probe. The latest DAPLink firmware is located in the firmware/daplink folder.
To program the firmware, complete the following steps:
-
Push and hold the button and plug your dongle into the USB port of your computer. Release the button after your dongle is connected. The RGB LED turns green.
-
It will mount as a Mass Storage Device called UF2BOOT.
-
Drag and drop the firmware with the name
daplink-nrf52840_mdk_usb_dongle-<version>.uf2onto the UF2BOOT volume. The RGB LED blinks red fast during flashing. -
Reset the dongle, the DAPLink firmware is running and a disk drive called DAPLINK will be automatically detected by the computer.
Installing pyOCD
The latest stable version of pyOCD may be installed via pip. Open up a terminal and run:
Wiring the boards
Perform the following steps to connect the boards:
- Connect the DAPLink board to the target board using the jumper wires.
- Plug the DAPLink board to the PC.
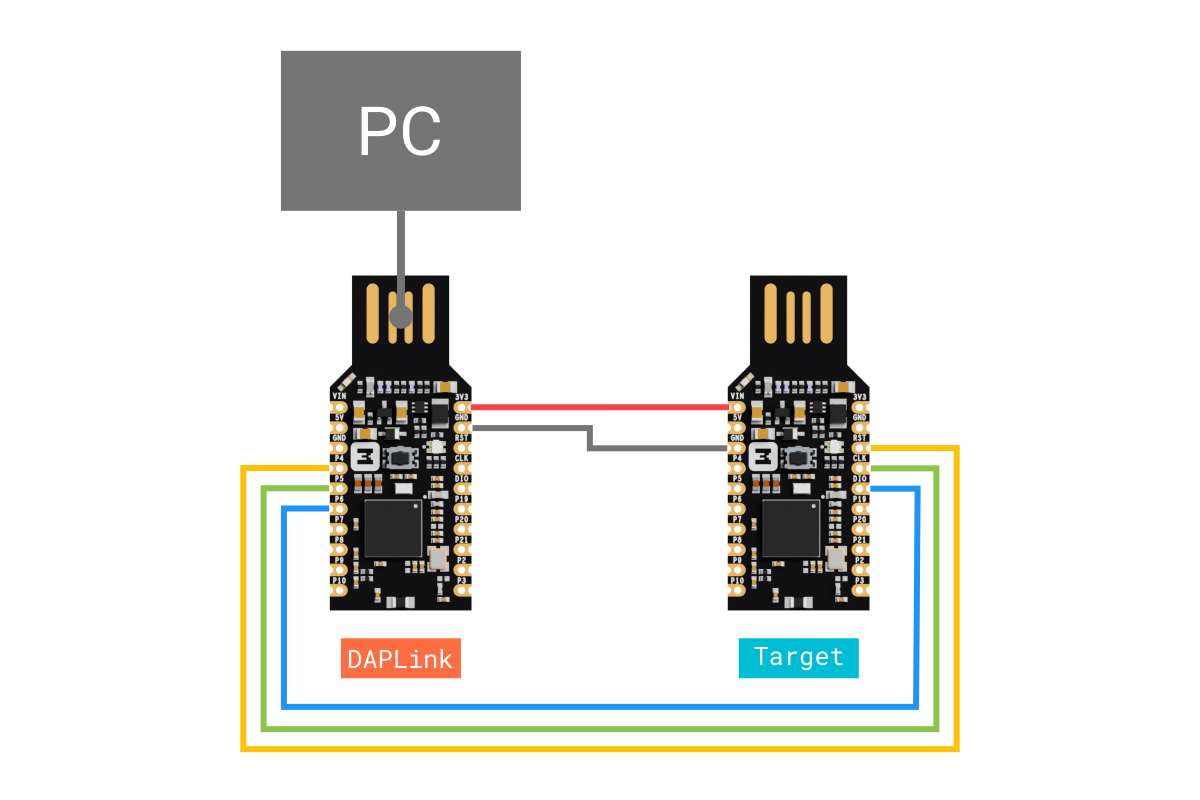
The following table shows the signals between the DAPLink and the target:
| DAPLink | Wire | Target |
|---|---|---|
3V3 | VIN | |
GND | GND | |
P4 | RESET | |
P5 | SWDCLK | |
P6 | SWDIO |
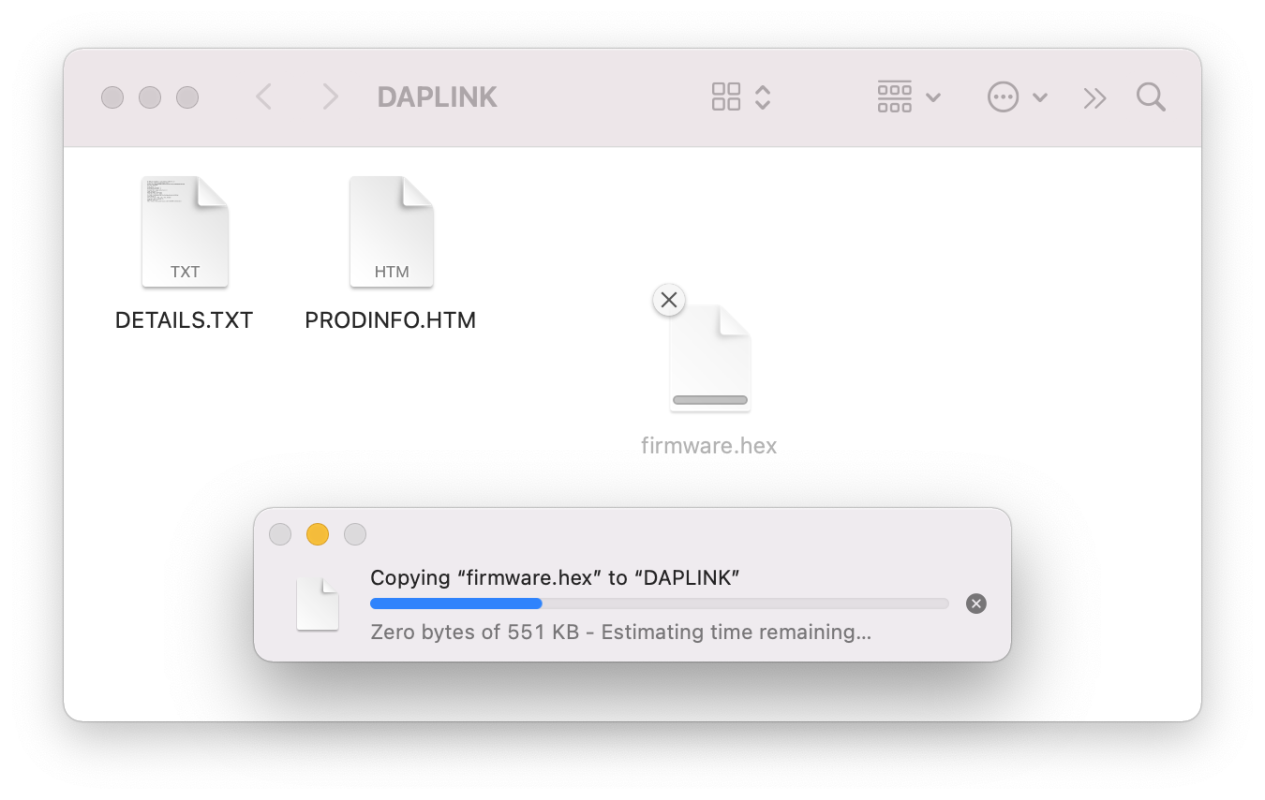
Drag-and-drop programming
Drag-and-drop is an optional intuitive programming feature of DAPLink. It allows programming of your target microcontroller in a very simple way: dragging and dropping a file (.hex-format) onto the DAPLINK drive.
Using pyOCD
The pyocd command line tool gives you total control over your device with these subcommands:
gdbserver: GDB remote server allows you to debug using gdb via either the console or several GUI debugger options.load: Program files of various formats into flash or RAM.erase: Erase part or all of an MCU's flash memory.pack: Manage CMSIS Device Family Packs that provide additional target device support.commander: Interactive REPL control and inspection of the MCU.server: Share a debug probe with a TCP/IP server.reset: Hardware or software reset of a device.rtt: Stream Segger RTT IO with any debug probe.list: Show connected devices.
You can get additional help by adding --help option.
To load/erase the nRF52840-based target, open up a terminal and run:
Explore further
To learn more about pyOCD, check the pyOCD Documentation.