Getting Started Guide
This guide walks you through setting up the nRF Connect SDK development environment, building and running the Hello World sample on the nRF9151 Connect Kit.
The nRF Connect SDK is based on the Zephyr Project, which means everything required by Zephyr’s Getting Started Guide is also suitable for the nRF Connect SDK.
Select and Update OS
Install available updates for your operating system:
Select Start > Settings > Update & Security > Windows Update. Click Check for updates and install any that are available.
On macOS Mojave or later, select System Preferences... > Software Update. Click Update Now if necessary.
On other versions, see this Apple support topic.
Install dependencies
Next, you’ll install some host dependencies using your package manager.
The current minimum required version for the main dependencies are:
| Tool | Min. Version |
|---|---|
| CMake | 3.20.5 |
| Python | 3.12 |
| Devicetree compiler | 1.4.6 |
In modern version of Windows (10 and later) it is recommended to install the Windows Terminal application from the Microsoft Store. Instructions are provided for a cmd.exe or PowerShell command prompts.
These instructions rely on Windows' official package manager, winget. If using winget isn’t an option, you can install dependencies from their respective websites and ensure the command line tools are on your PATH environment variable.
-
In modern Windows versions,
wingetis already pre-installed by default. You can verify that this is the case by typingwingetin a terminal window. If that fails, you can then install winget. -
Open a Command Prompt (
cmd.exe) or PowerShell terminal window. To do so, press the Windows key Win , typecmd.exeor PowerShell and click on the result. -
Use
wingetto install the required dependencies: -
Close the terminal window.
Note
You may need to add the 7zip installation folder to your PATH.
-
Install Homebrew:
-
After the Homebrew installation script completes, follow the on-screen instructions to add the Homebrew installation to the path.
-
Use
brewto install the required dependencies: -
Add the Homebrew Python folder to the path, in order to be able to execute
pythonandpipas wellpython3andpip3.
-
Use
aptto install the required dependencies:Note
Due to the unavailability of
gcc-multilibandg++-multilibon AArch64 (ARM64) systems, you may need to omit them from the list of packages to install. -
Verify the versions of the main dependencies installed on your system by entering:
Check those against the versions in the table in the beginning of this section. Refer to the Install Linux Host Dependencies page for additional information on updating the dependencies manually.
Get the code and install Python dependencies
To help you quickly build and run the samples on the nRF9151 Connect Kit, the primary nrf9151-connectkit repository contains the nRF Connect SDK manifest repositories, additional hardware drivers and tested samples, etc.
In the following instructions the name NCS-Project is used for the workspace, however in practice its name and location can be freely chosen. You’ll also install additional Python dependencies in a Python virtual environment.
-
Open a
cmd.exeterminal window as a regular user -
Create a new virtual environment:
-
Activate the virtual environment:
Note
Python’s virtual environment activation in PowerShell requires running a script itself, which needs to be allowed.
Once activated your shell will be prefixed with
(.venv). The virtual environment can be deactivated at any time by runningdeactivate.Note
Remember to activate the virtual environment every time you start working.
-
Install
west: -
Get the latest source code:
-
Enter the following commands to clone the project repositories:
After all the repositories updated, your workspace folder now looks similar to this:
-
Export a Zephyr CMake package. This allows CMake to automatically load boilerplate code required for building Zephyr applications.
-
Install Python dependencies using
west packages.Note
This could downgrade or upgrade west itself.
-
Create a new virtual environment:
-
Activate the virtual environment:
Once activated your shell will be prefixed with
(.venv). The virtual environment can be deactivated at any time by runningdeactivate.Note
Remember to activate the virtual environment every time you start working.
-
Install
west: -
Get the latest source code:
-
Enter the following commands to clone the project repositories:
After all the repositories updated, your workspace folder now looks similar to this:
-
Export a Zephyr CMake package. This allows CMake to automatically load boilerplate code required for building Zephyr applications.
-
Install Python dependencies using
west packages.Note
This could downgrade or upgrade west itself.
Install the Zephyr SDK
The Zephyr Software Development Kit (SDK) contains toolchains for each of Zephyr’s supported architectures, which include a compiler, assembler, linker and other programs required to build Zephyr applications.
It also contains additional host tools, such as custom QEMU and OpenOCD builds that are used to emulate, flash and debug Zephyr applications.
Install the Zephyr SDK using the west sdk install.
Install the Zephyr SDK using the west sdk install.
Tip
Using the command options, you can specify the SDK installation destination and which architecture of toolchains to install. See west sdk install --help for details.
Note
If you want to install Zephyr SDK without using the west sdk command, please see Zephyr SDK installation.
Build the Hello World sample
Now, you can build the Hello World sample with west build, specifying the board (following the -b option) as nrf9151_connectkit/nrf9151.
The -p always option forces a pristine build, and is recommended for new users. Users may also use the -p auto option, which will use heuristics to determine if a pristine build is required, such as when building another sample.
Flash and run the sample
Connect the nRF9151 Connect Kit to the computer with a USB-C cable:

Then flash the sample using west flash:
Open up a serial terminal, specifying the correct serial port that your computer uses to communicate with the nRF9151 SiP:
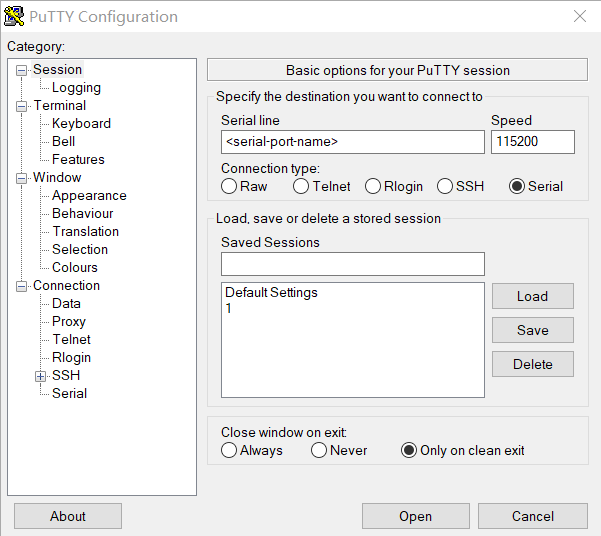
- Start PuTTY.
-
Configure the correct serial port and click Open:
Observe the output of the terminal. You should see the output, similar to what is shown in the following:
Next steps
Explore more applications or samples running on the nRF9151 Connect Kit:
-
Explore applications
Show how to implement typical user scenarios and can be served as a starting point for developing your product.
-
Explore samples
Show how to implement typical use cases with Nordic Semiconductor libraries and drivers.
-
nRF Connect SDK Documentation
Official latest documentation for the nRF Connect SDK maintained by Nordic Semiconductor.
-
Zephyr Project Documentation
Learn everything about the Zephyr Project, including architecture, features and application development, etc.