nRF Cloud MQTT Cellular Location
Overview
The nRF Cloud MQTT Cellular Location sample demonstrates how to use the nRF Cloud MQTT API for nRF Cloud’s cellular location service on your device.
After the sample initializes and connects to the network, it sends a cell location request to nRF Cloud. For this purpose, the sample uses network data obtained from the Location library.
See the nRF Cloud Location Services documentation page for additional information.
Requirements
Before you start, check that you have the required hardware and software:
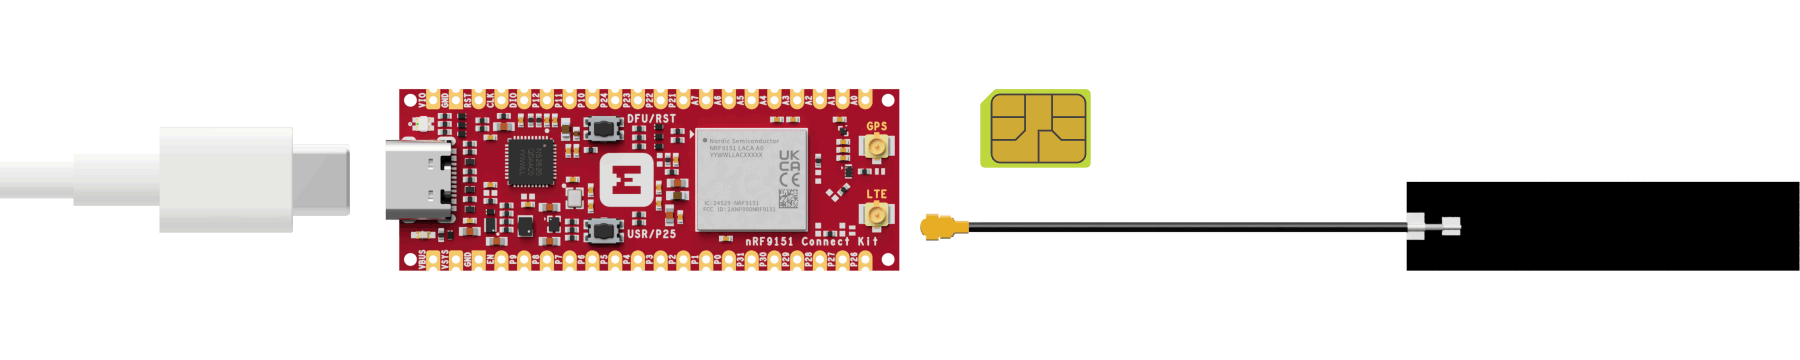
- 1x nRF9151 Connect Kit
- 1x nano-SIM card with LTE-M or NB-IoT support
- 1x U.FL cabled LTE-M/NB-IoT/NR+ Flexible Antenna (included in the box)
- 1x USB-C Cable
- A computer running macOS, Ubuntu, or Windows 10 or newer
Don't have an nRF Cloud account?
To connect your device and use nRF Cloud services, you must create an nRF Cloud account:
- Go to the nRF Cloud portal and click Register.
- Enter your email address and choose a password.
- Click Create Account.
-
Check for a verification email from nRF Cloud.
Tip
If you do not see the verification email, check your junk mail folder for an email from
no-reply@verificationemail.com. -
Copy the six-digit verification code and paste it into the registration dialog box.
Tip
If you accidentally closed the registration dialog box, repeat Step 1 and click Already have a code?. Enter your email address and verification code.
You can now log in to the nRF Cloud portal with your email and password. After logging in, you can see the Dashboard view that displays your device count and service usage.
Device on-boarding with nRF Cloud
Your device must be onboarded with nRF Cloud. If it is not, follow the nRF Cloud Device Provisioning to provision your device.
Set up your board
- Insert the nano-SIM card into the nano-SIM card slot.
- Attach the U.FL cabled LTE-M/NB-IoT/NR+ Flexible Antenna.
- Connect the nRF9151 Connect Kit to the computer with a USB-C cable.
Building the sample
To build the sample, follow the instructions in Getting Started Guide to set up your preferred building environment.
Use the following steps to build the nRF Cloud MQTT Cellular Location sample on the command line.
-
Open a terminal window.
-
Go to
NCS-Project/nrf9151-connectkitrepository cloned in the Getting Started Guide. -
Build the sample using the
west buildcommand, specifying the board (following the-boption) asnrf9151_connectkit/nrf9151/ns.The
-palways option forces a pristine build, and is recommended for new users. Users may also use the-p autooption, which will use heuristics to determine if a pristine build is required, such as when building another sample.Note
This sample has Cortex-M Security Extensions (CMSE) enabled and separates the firmware between Non-Secure Processing Environment (NSPE) and Secure Processing Environment (SPE). Because of this, it automatically includes the Trusted Firmware-M (TF-M).
-
After building the sample successfully, the firmware with the name
tfm_merged.hexcan be found in thebuild/nrf_cloud_mqtt_cell_location/zephyrdirectory.
Flashing the firmware
Set up your board before flashing the firmware. You can flash the sample using west flash:
Tip
In case you wonder, the west flash will execute the following command:
Testing
After programming the sample, test it by performing the following steps:
-
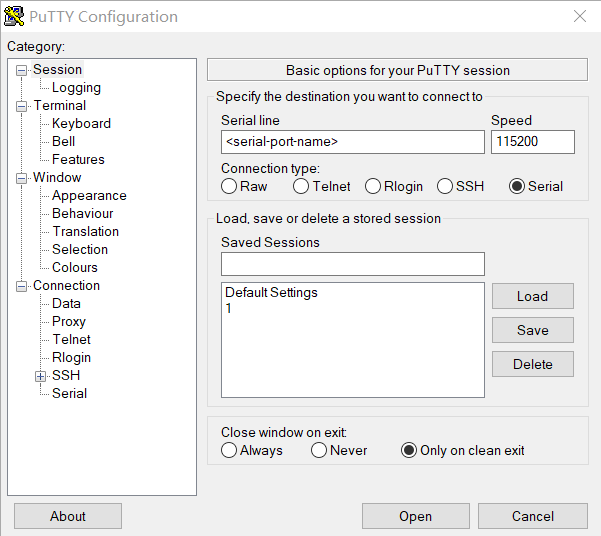
Open up a serial terminal, specifying the correct serial port that your computer uses to communicate with the nRF9151 SiP:
- Start PuTTY.
-
Configure the correct serial port and click Open:
-
Press the DFU/RST button to reset the nRF9151 SiP.
-
Once the device is provisioned and connected, you should see the output, similar to what is shown in the following:
-
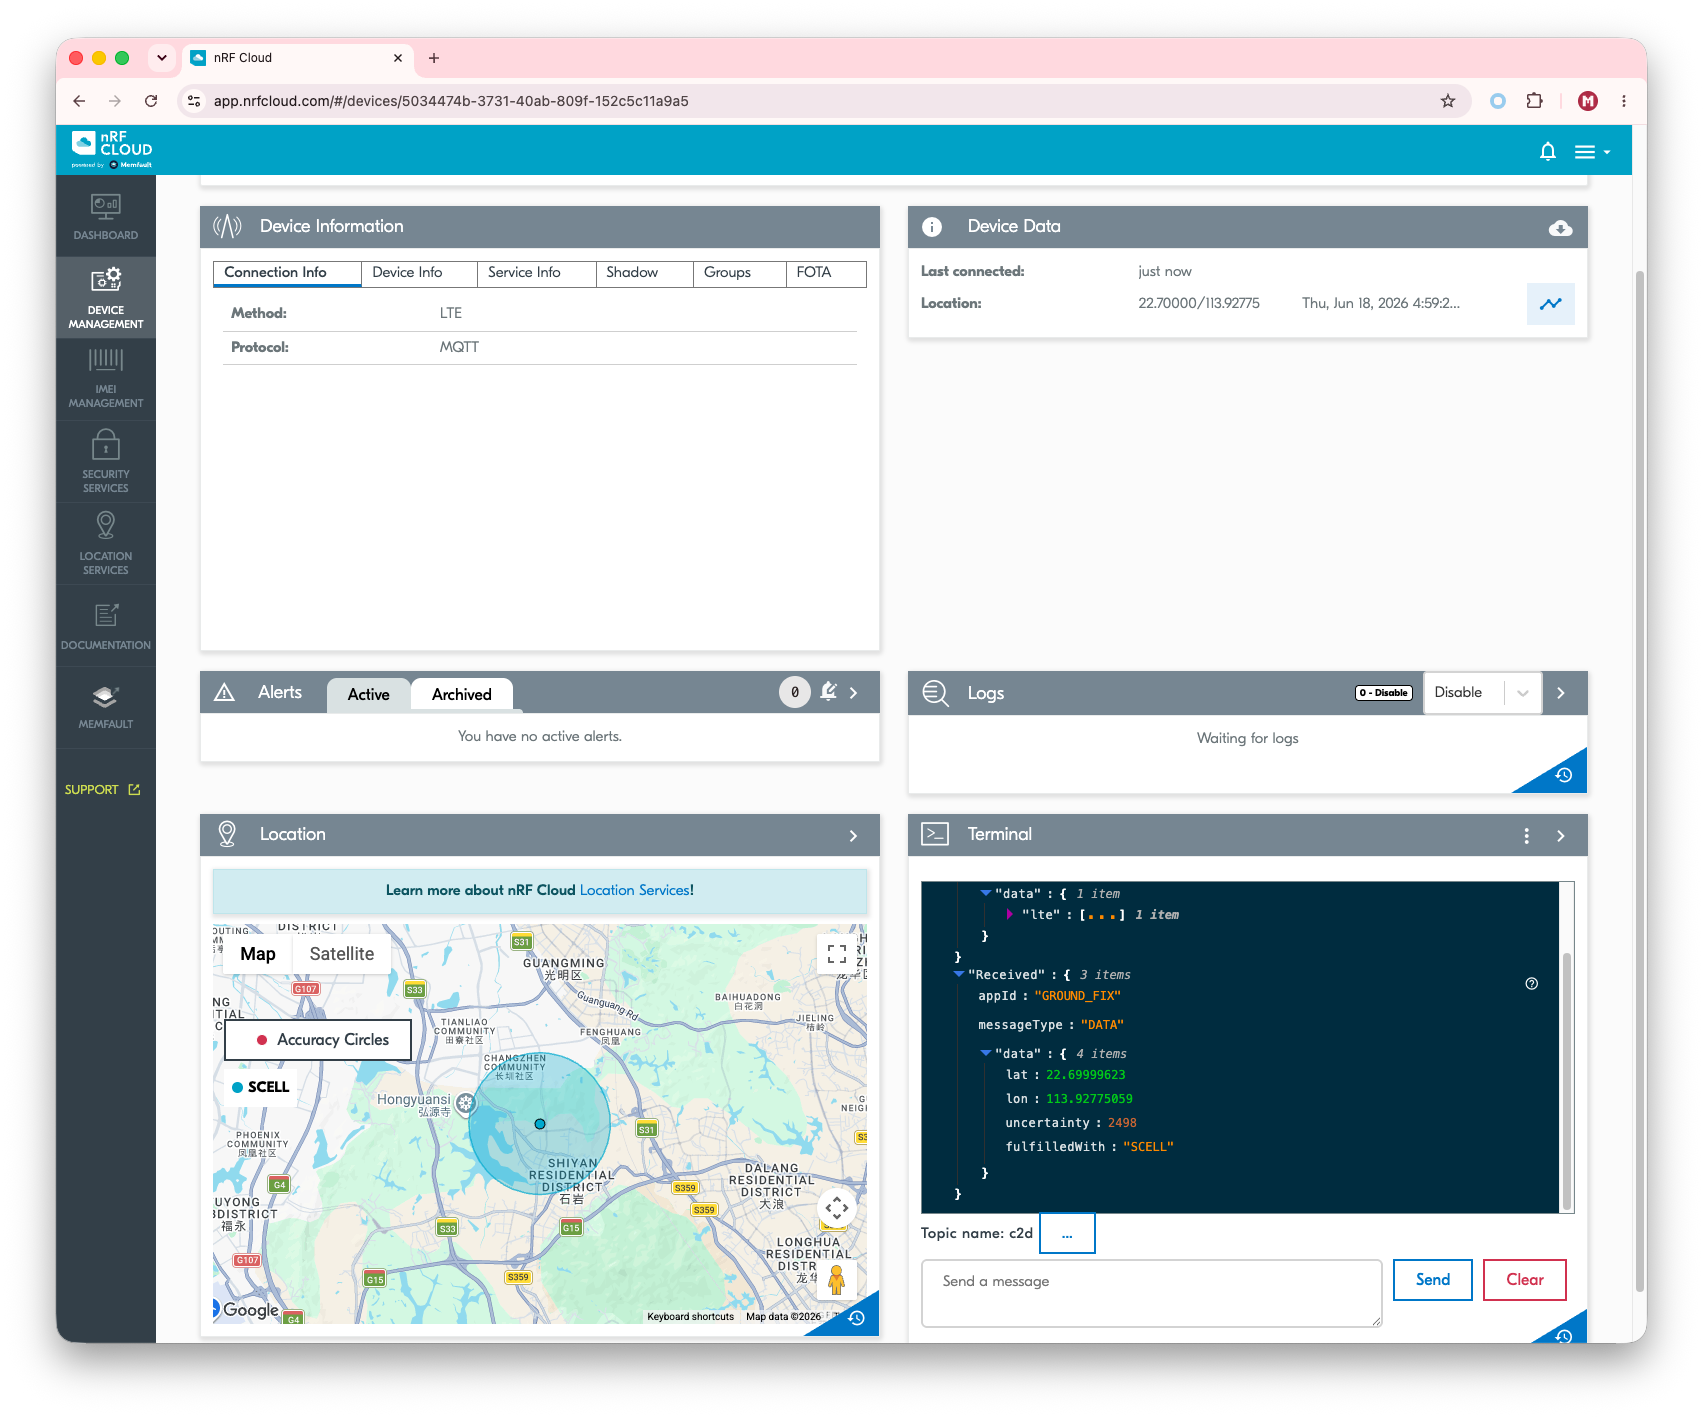
After the cell location request sent to nRF Cloud, verify that on the nRF Cloud:
- Select Device Management -> Devices.
- Click the ID of the device you added.
- On the device’s page, you should see the cell location displayed on the Location tab.