Getting Started Out of the Box
Introduction
This guide is intended to assist users in the initial setup and demonstration of the basic usage with Pitaya-Link:
What you'll need
- A Pitaya-Link Debug Probe
- A macOS/Linux/Windows PC
- An nRF52 target board(e.g. nRF52840 MDK USB Dongle)
Connect the target
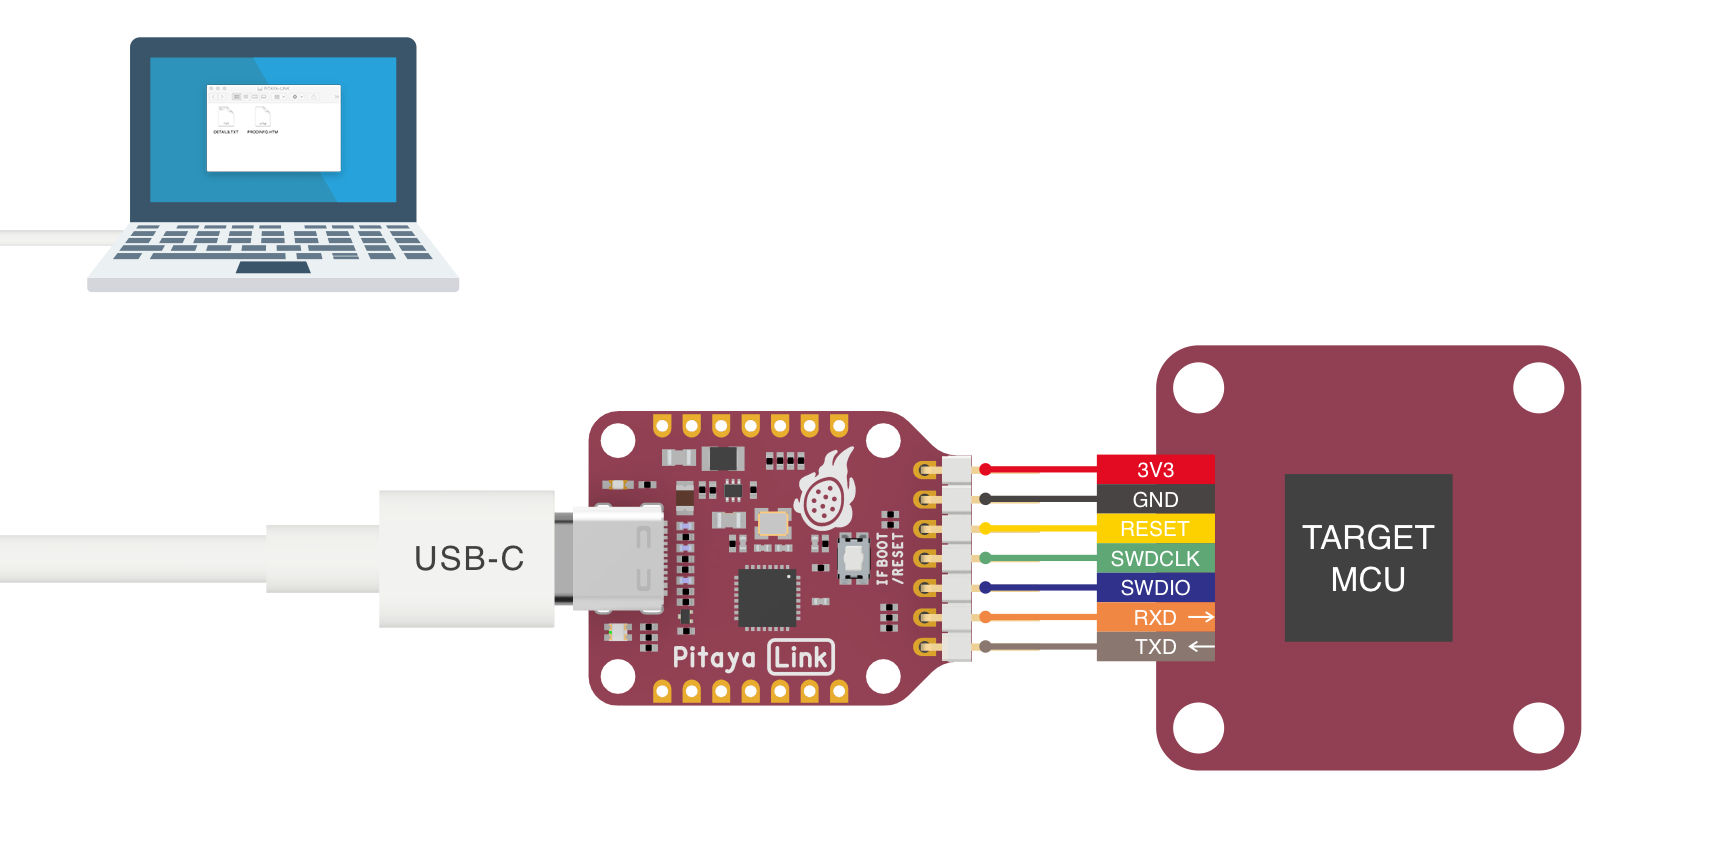
Perform the following steps to connect the target board:
- Connect the target board to Pitaya-Link using the provided 7-pin Cable.
- Connect Pitaya-Link to the PC using the provided USB-C Cable.
- A disk drive called PITAYA-LINK will be automatically detected by the computer.
Logging via Serial port
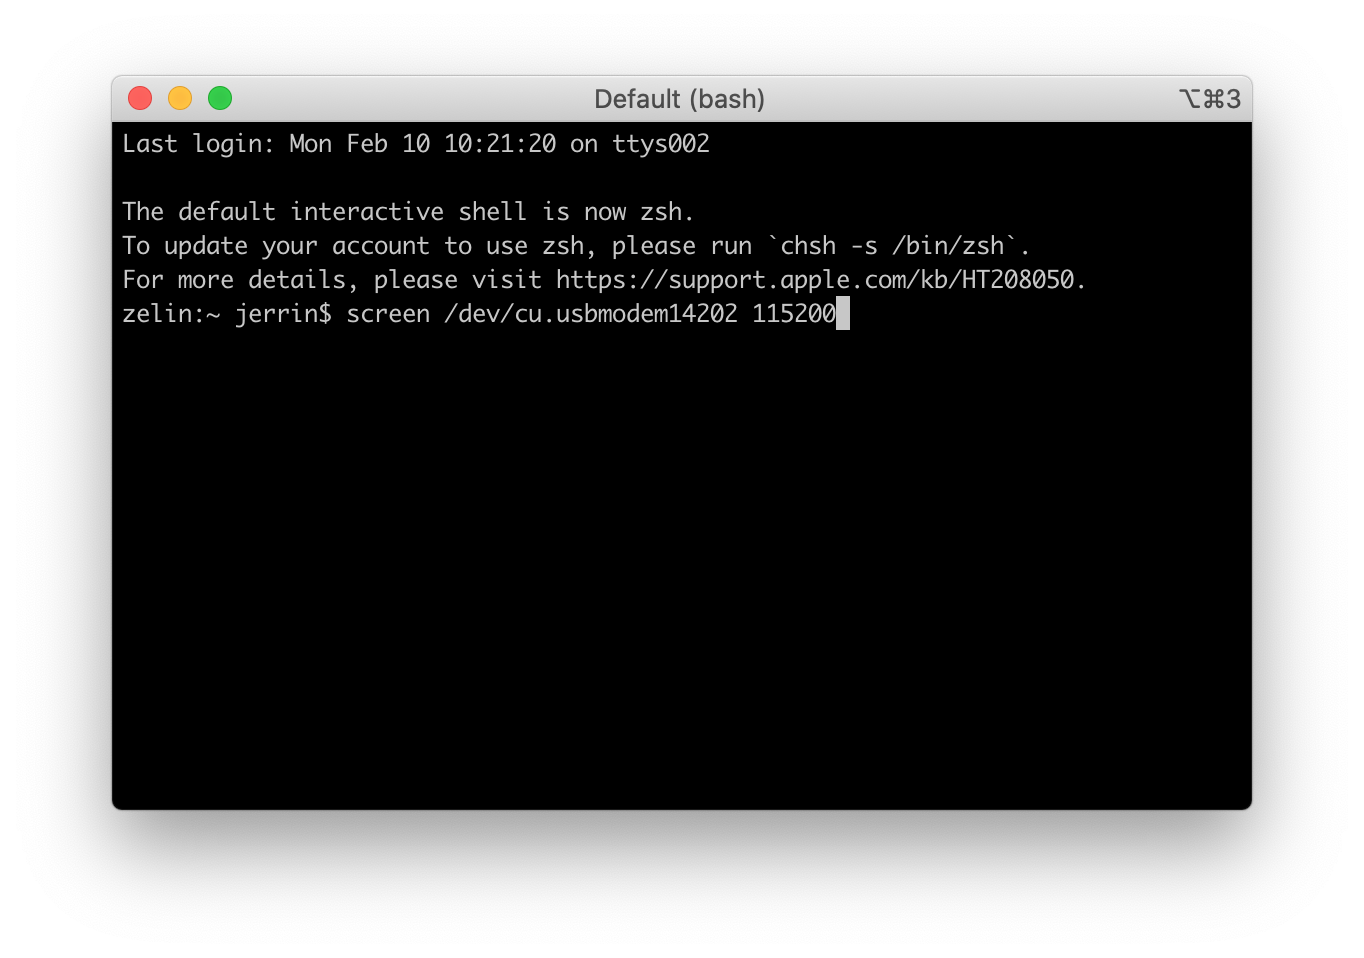
Pitaya-Link enables developers with a Virtual COM Port which you can use for logging and reporting application state.
There are many Terminal applications available for your host PC. They provide a window where your target can print messages. Select the tool according to your host:
Drag-and-drop programming
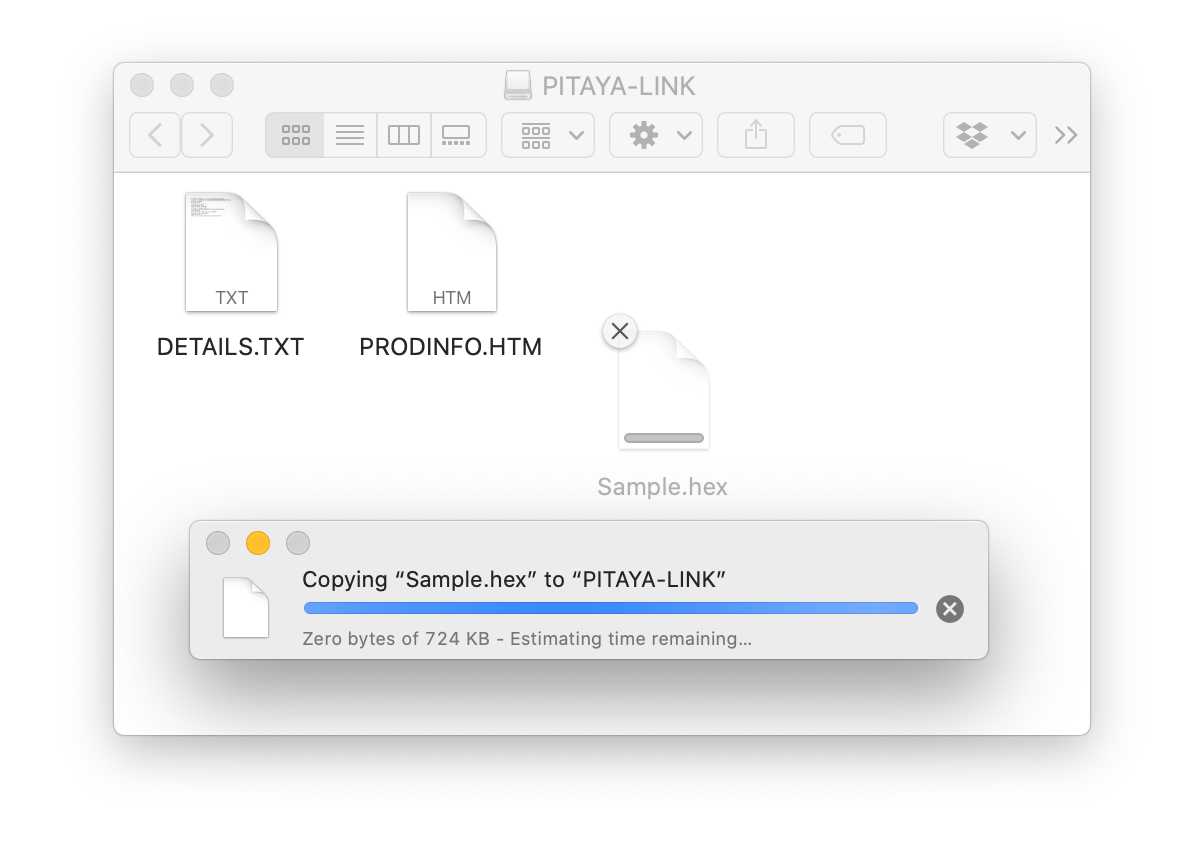
Drag-And-Drop is an optional intuitive programming feature. It allows programming of your target MCU in a very simple way: dragging and dropping a file (.hex-format) onto the PITAYA-LINK drive.
There is no need to install application software. Anyone that can drag and drop a file to a USB memory stick can now program the target board.
Tip
Upon completion, the drive remounts. If a failure occurs, the file FAIL.TXT appears on the drive containing information about the failure.
Programming via pyOCD
pyOCD is an open source Python package for programming and debugging Arm Cortex-M microcontrollers using multiple supported types of USB debug probes. It is fully cross-platform, with support for Linux, macOS, and Windows.
The latest stable version of pyOCD can be installed via pip as follows:
pip install -U pyocd
Here is an example command showing how to flash an nRF52840-based target:
pyocd flash -t nrf52840 Sample.hex
Tip
For more instructions about using pyOCD, see Usage with pyOCD section.
Explore Further
Now that you are familiar with the Pitaya-Link, it's time to explore more tutorials available below:
- Using Pitaya-Link with pyOCD
- Using Pitaya-Link with DAP.js
- Using Pitaya-Link with Visual Studio Code
- Using Pitaya-Link with GNU MCU Eclipse
- Using Pitaya-Link with KEIL µVision IDE
- Using Pitaya-Link with IAR Embedded Workbench
- Upgrading the DAPLink Firmware
- Building your own DAPLink Firmware
Create an Issue
Interested in contributing to this project? Want to report a bug? Feel free to click here: