Using Pitaya-Link with IAR Embedded Workbench
Introduction
IAR's EWARM is a completely integrated development environment that supports CMSIS-DAP out-of-the-box.
This guide explains how to configure the local debug toolchain using Pitaya-Link with IAR's EWARM.
Requirements
- A Pitaya-Link Debug Probe
- IAR Embedded Workbench for ARM
- An nRF52 target board (e.g. nRF52840 MDK USB Dongle)
Connecting the target
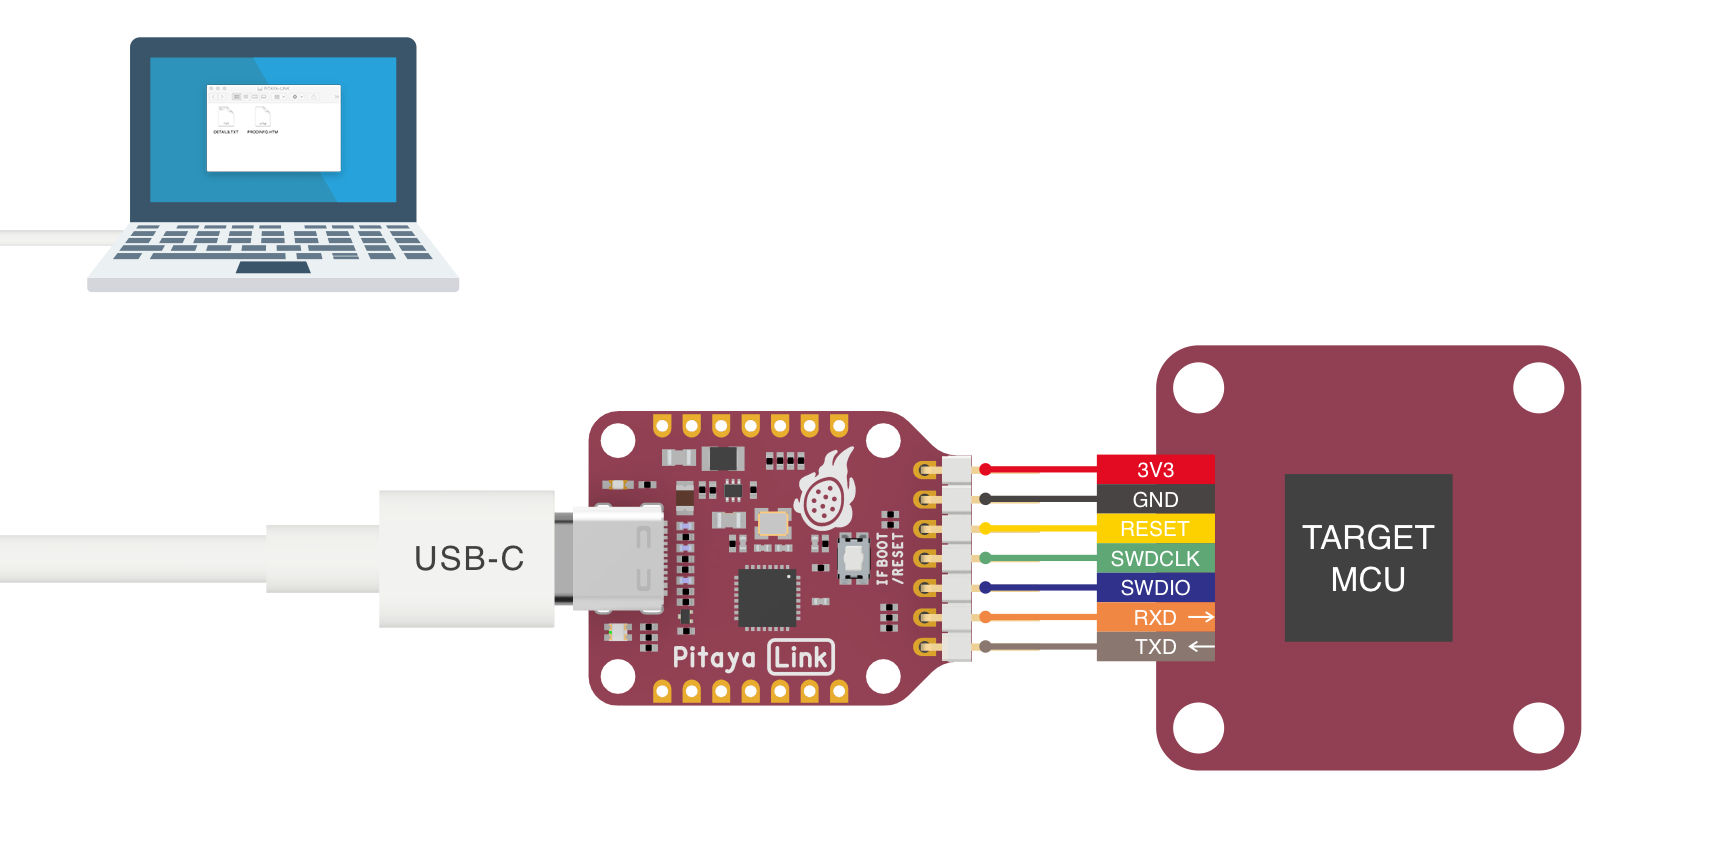
Perform the following steps to connect the target board:
- Connect the target board to Pitaya-Link using the provided 7-pin Cable.
- Connect Pitaya-Link to the PC using the provided USB-C Cable.
Configuring the debugger
- Open your IAR project.
- Click Options from the Project menu.
-
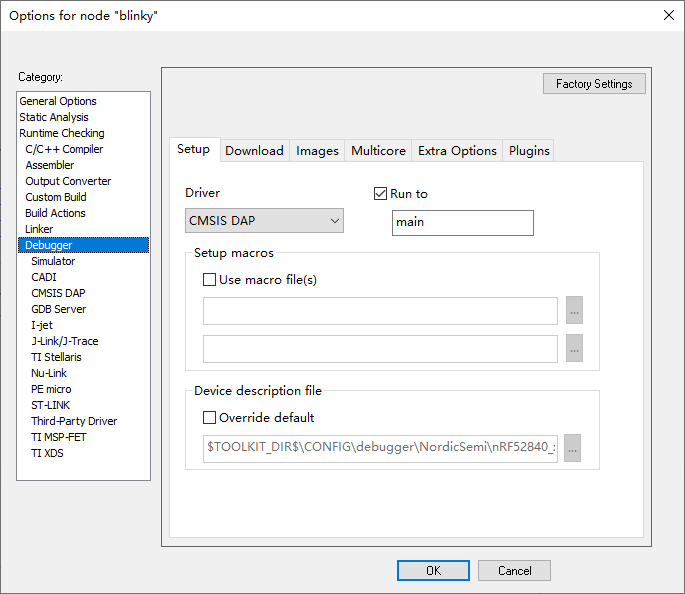
In the option window, select Debugger from the menu on the left. In the Setup tab, select CMSIS DAP from the Driver drop-down menu.
-
In the Download tab, check Verify download and Use flash loader(s). Make sure that the correct
.boardfile is used.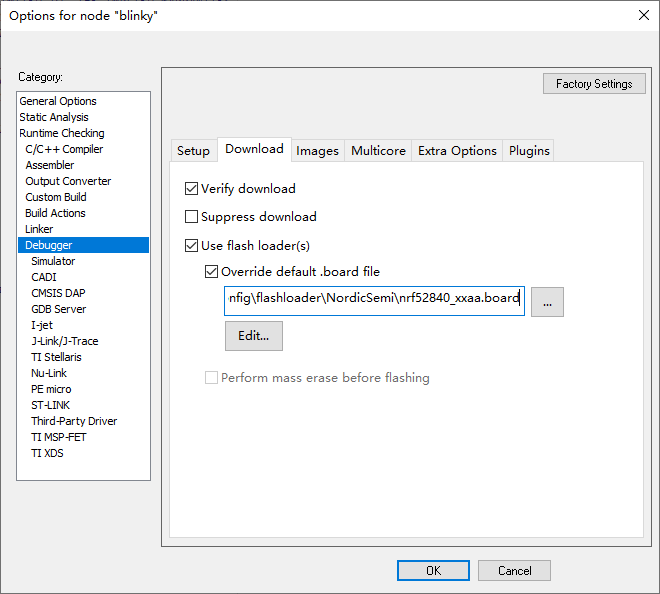
-
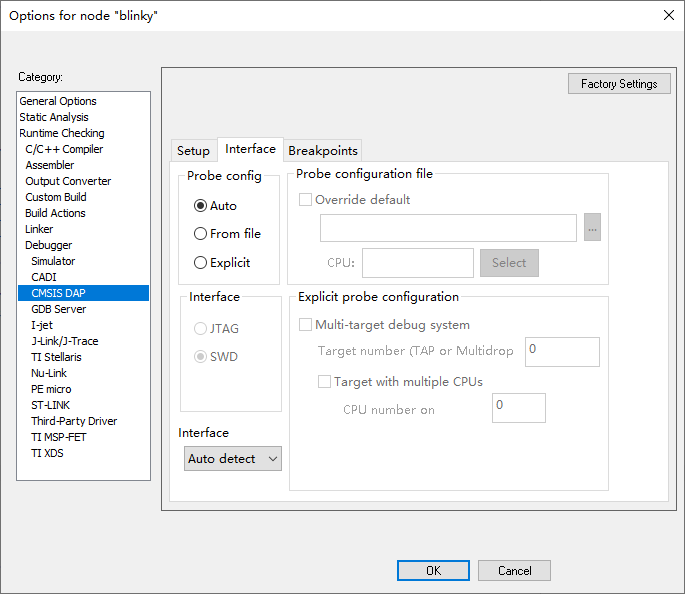
Select CMSIS DAP from the menu on the left, select the Interface tab and configure the SWD protocol.
-
Click OK to save the options.
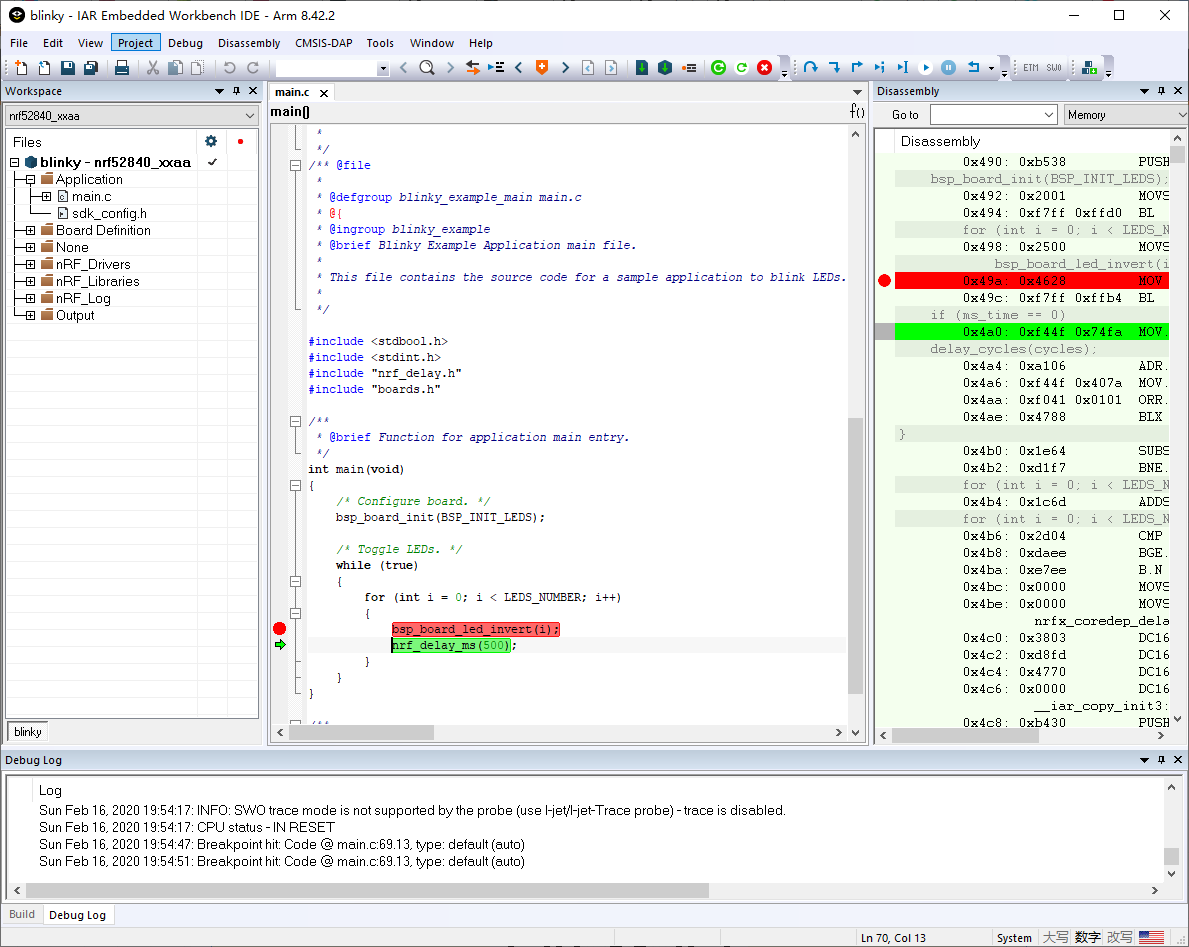
Debugging your project
- Insert a Breakpoint in your code.
- Click the menu Project -> Download and Debug, and debugging starts.
- Now you can explore IAR's debugging capabilities.
Create an Issue
Interested in contributing to this project? Want to report a bug? Feel free to click here: