Getting started with Bluetooth Mesh Network
This section describes how to quickly build a Bluetooth Mesh network using my light switch example without going through the complete toolchain installation.
There is no need to build any firmware for running it, as it uses the pre-built firmware of my light switch example.
Hardware Requirements
A minimal Bluetooth Mesh network requires at least One client, Two servers and One provisioner. Before starting to work, prepare the following parts:
- Grove Mesh Kit for nRF52840-MDK * 3
- Three AA batteries(Energizer® Ultimate Lithium™ AA battery is recommended to stay powered longer.)
- A phone with nRF Mesh mobile app(iOS or Android) installed
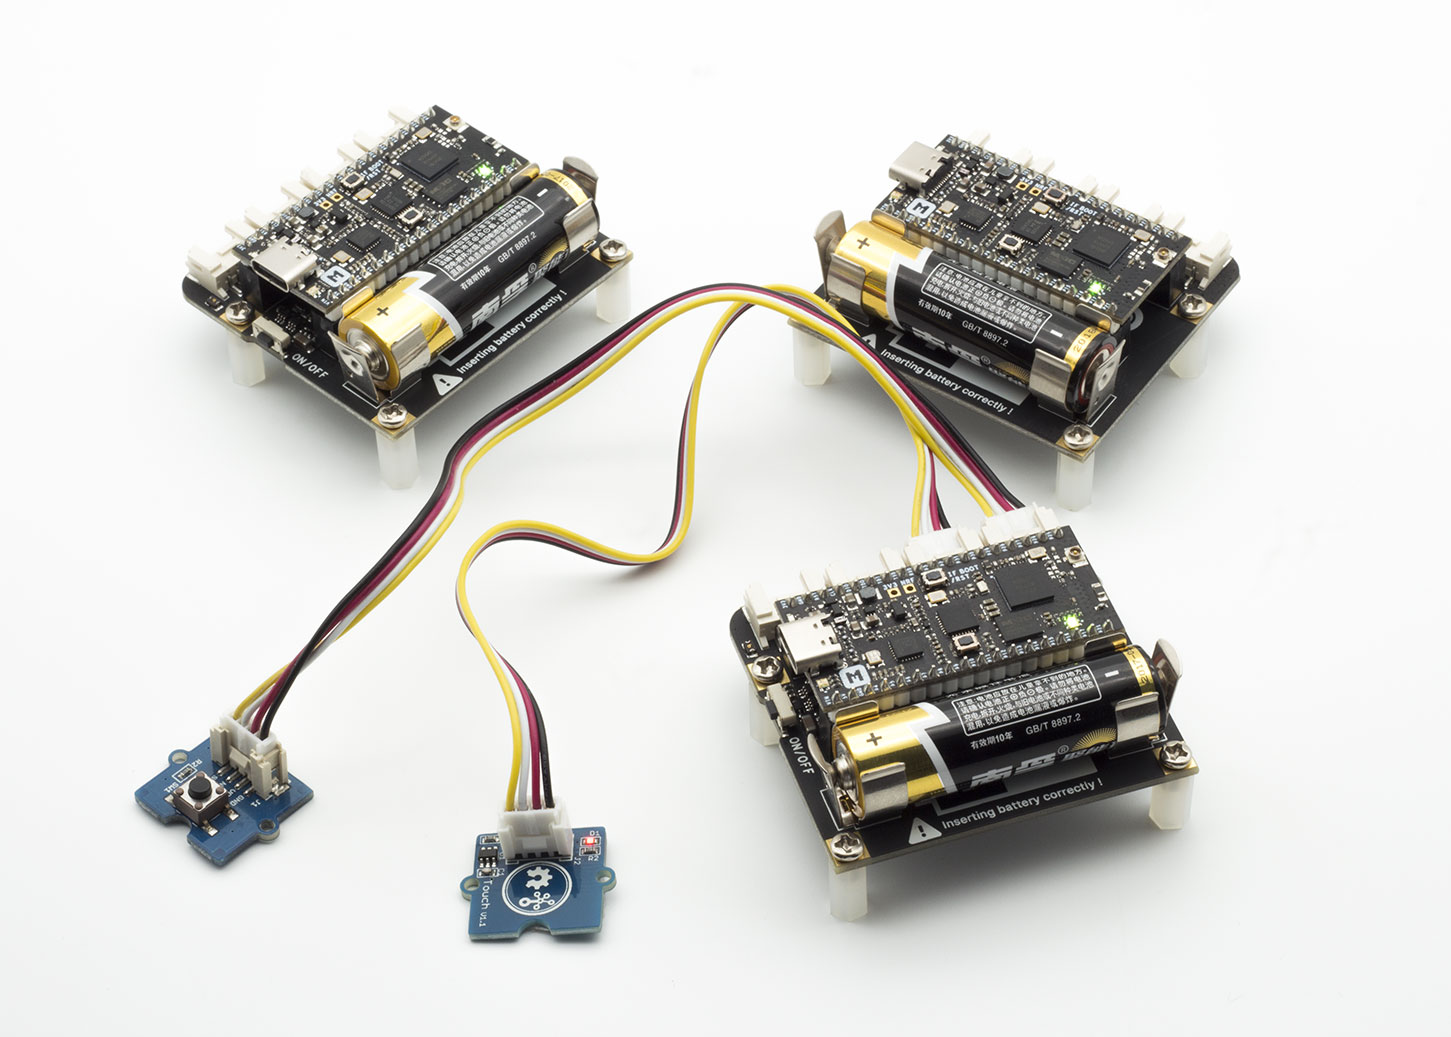
Assembling the hardware
-
Place the nRF52840-MDK board onto the Base Dock
-
Connect the Grove - Button to PORT#1 on the Base Dock
-
Attach the four plastic spacers supplied in your box to act as legs for the Base Dock
-
Insert an AA battery into the holder the right way around as marked on the board
Tip
AA battery is NOT included in the kit. The Energizer® Ultimate Lithium™ AA battery is recommended to stay powered longer.

Flashing the example firmware
Before running my light switch example, you need to flash the boards. The pre-built firmware is located in grove-mesh-kit/firmware/bluetooth-mesh/my_light_switch:
- For Client: my_light_switch_client_nrf52840_xxAA_s140_6.1.0_merged.hex
- For Servers: my_light_switch_server_nrf52840_xxAA_s140_6.1.0_merged.hex
Tip
The provisioner firmware is not used here. The nRF Mesh app is used instead to provision the devices.
- Connect one nRF52840-MDK board to your PC using the USB-C cable. A removable drive named DAPLINK will appear.
- Drag and drop the pre-built client firmware into DAPLINK. After flashed, label the board Client so that later you don't confuse the board roles.
- Program the rest two boards with the pre-build server firmware. And label them Server#1 and Server#2.
Provisioning the devices
To participate in mesh communication, each device must be provisioned. Provisioning is the act of adding a device to a mesh network. Through the provisioning process, the new device receives a range of addresses, a network key, and a device key.
Here we use the nRF Mesh mobile app to provision the client and server devices:
- Power up the client and servers
- Launch the nRF Mesh mobile app. In Network tab, click + button to scan the devices. The client is recognized as
nRF5x Mesh Switchand the servers are recognized asnRF5x Mesh Light.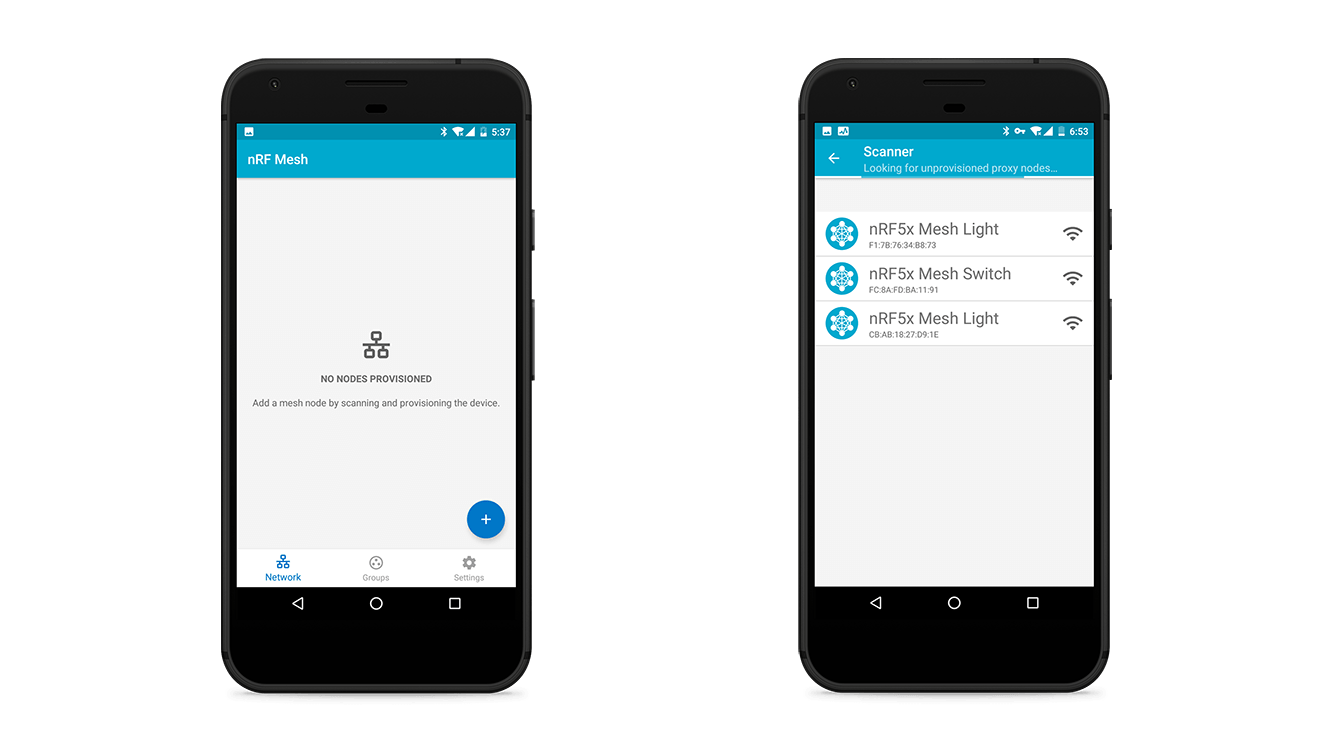
-
Tap
nRF5x Mesh Switch, and then go to the Provisioning Data configurations. Give the node a friendly name, such asLiving Room Switch. Upon tapping IDENTIFY, the LED is blinking blue. Tap PROVISION and select No OOB type to finish provisioning.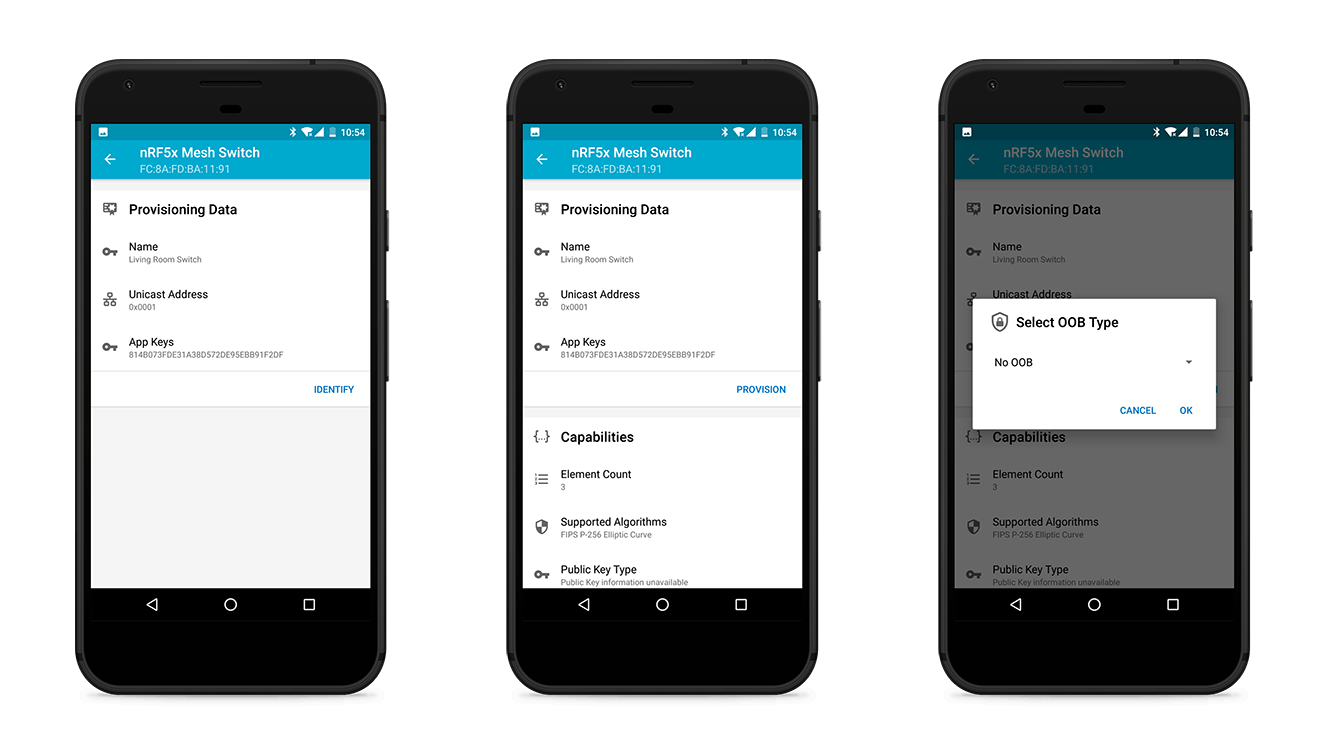
-
Tap ⚙ to configure the
Living Room Switch. You will see two Generic On Off Client elements. Bind them with the same app key. Set the publish address of the first Generic On Off Client to0xCAFEand the second one to0xCAFF. The publish addresses can be subscribed by the servers.
-
Tap
nRF5x Mesh Lightand go to the Provisioning Data configurations. Name the nodesLiving Room Light 1andLiving Room Light 2. Go ahead to finish provisioning.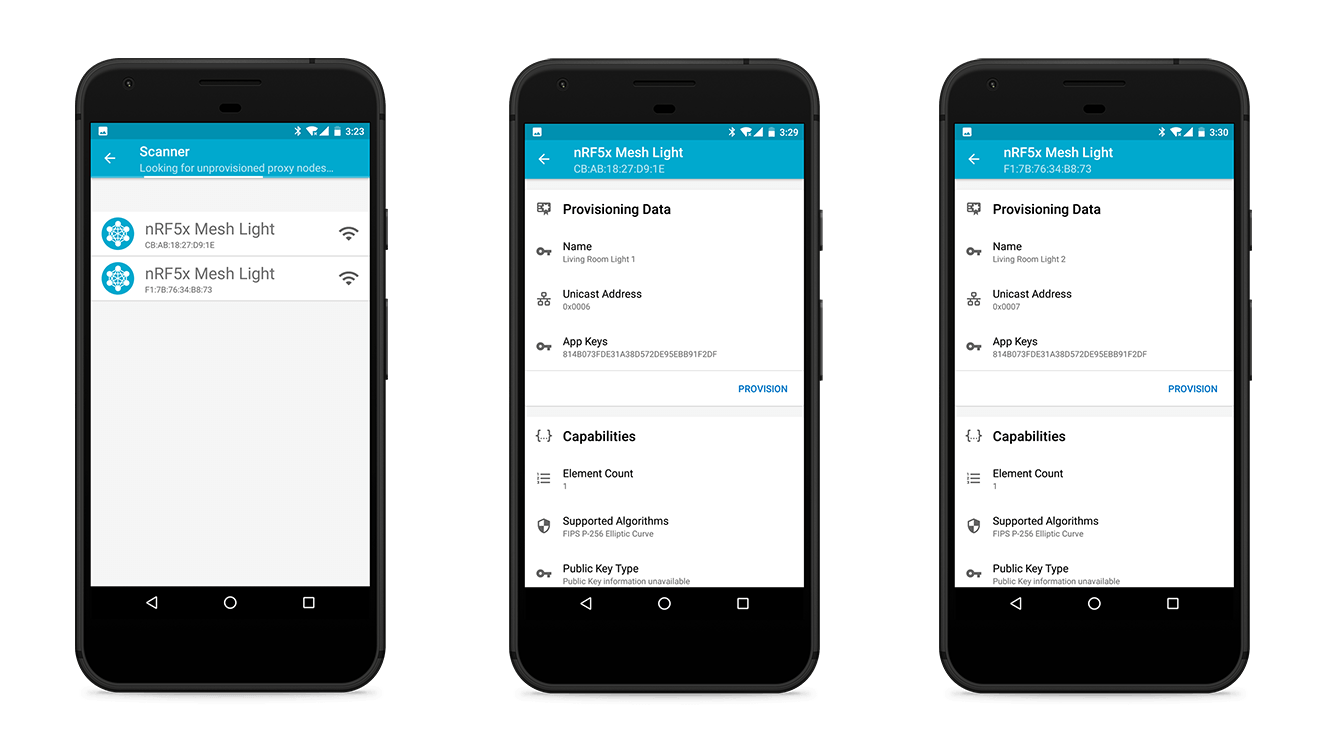
-
Tap ⚙ to configure the
Living Room Light 1andLiving Room Light 2. Bind theGeneric On Off Serverwith the same app key as the client. Set the subscribe address to the client's publish address0xCAFEor0xCAFF.
Testing the mesh network
Now you have set up a Bluetooth mesh network with one client node and two server nodes. Try to press the buttons on the client to see the LEDs getting toggled on the associated servers.
Next Steps
See the Setting Up the Mesh SDK section for information on environment setup.
Once you set up your nRF5 SDK for Mesh environment, see the Building & Running the examples to build the examples on your own machine. And further more, you can create your own targets.
Create an Issue
Interested in contributing to this project? Want to report a bug? Feel free to click here: