UDP Server Example
Description
This example demonstrates the use of the Wi-Fi module with the Pitaya Go board to test the UDP server.
This example also implements the Command Line Interface over BLE NUS and USB CDC ACM. Both consoles can be opened and used independently.
Tip
Before you start building, remember to set up the nRF5 SDK development environment first. See Setup the nRF5 SDK for details.
Building the example
You can find the source code and the project file of the example in the following folder: pitaya-go/examples/wifi/simple_udp_server_example.
Open terminal and navigate to the directory with the example Makefile:
cd ./pitaya-go/examples/wifi/simple_udp_server_example/armgcc
Run make to build the example:
make
Programming the firmware
If compiled successfully, the firmware is located in simple_udp_server_example/armgcc/_build with the name nrf52840_xxaa.hex.
While pushing the USER button, press the RESET button to enter the DFU mode. Then program the firmware using the nRF Connect for Desktop tool.
If the SoftDevice is not programmed before, remember to add the SoftDevice. The SoftDevice is located in <nRF5 SDK>/components/softdevice/s140/hex/s140_nrf52_6.1.0_softdevice.hex.
Tip
See Programming section for details about how to program your Pitaya Go.
Testing
The application is now programmed and running. Perform the following steps to test the UDP server:
-
Run a terminal application like PuTTY or screen:
screen /dev/cu.usbmodemD2E39D222D781 115200 -
Press Enter in the terminal. A console prompt is displayed.
-
Use the Tab key to print the available commands.
-
Use command
wifi connect {SSID} {PSK}to connect to your AP. The parameters stand for the following:{SSID}: The name of AP. If not specified, the device will attempt to reconnect to the last-associated AP.{PSK}: The passphrase of AP. MUST be 8 characters or more. If it's an Open network, it can be left blank.
-
Observe that BLUE LED is lit, that is, the Wi-Fi is connected. The local IP will display:
Wi-Fi connected
Wi-Fi IP is 192.168.137.189
Press <Enter> to continue...
-
Use command
udp bind 6666to bind the UDP socket. -
Navigate to the
scriptdirectory and start a UDP client on your host. Replace192.168.137.189with your own server IP.python ./udp_client.py 192.168.137.189 6666
-
Observe that the message received from the client will display in the console.
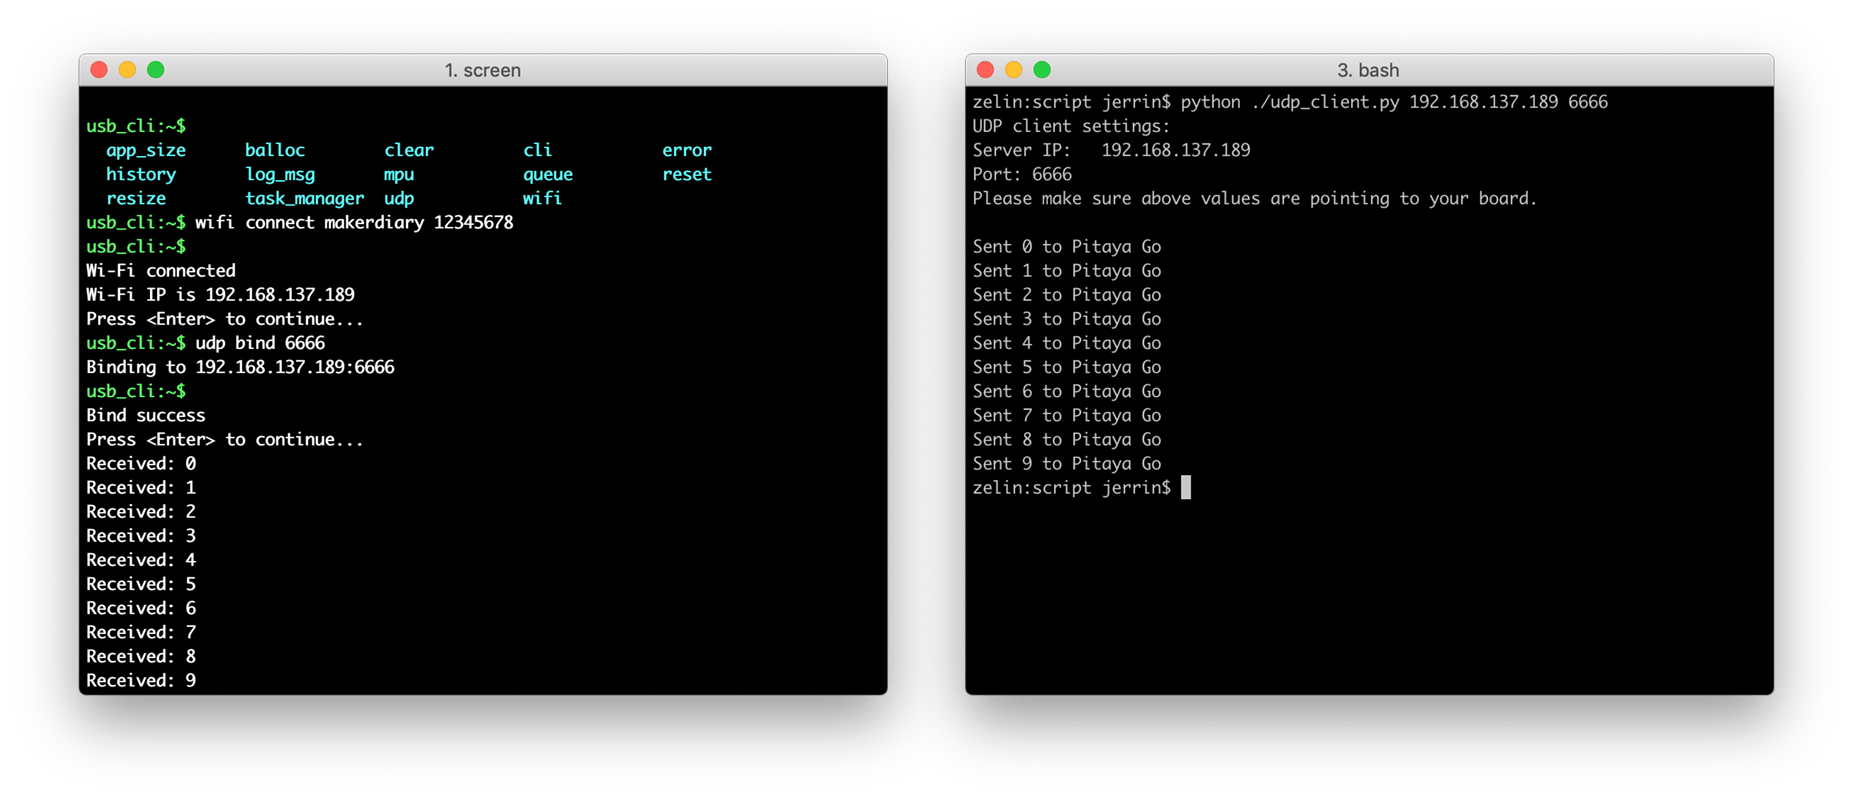
-
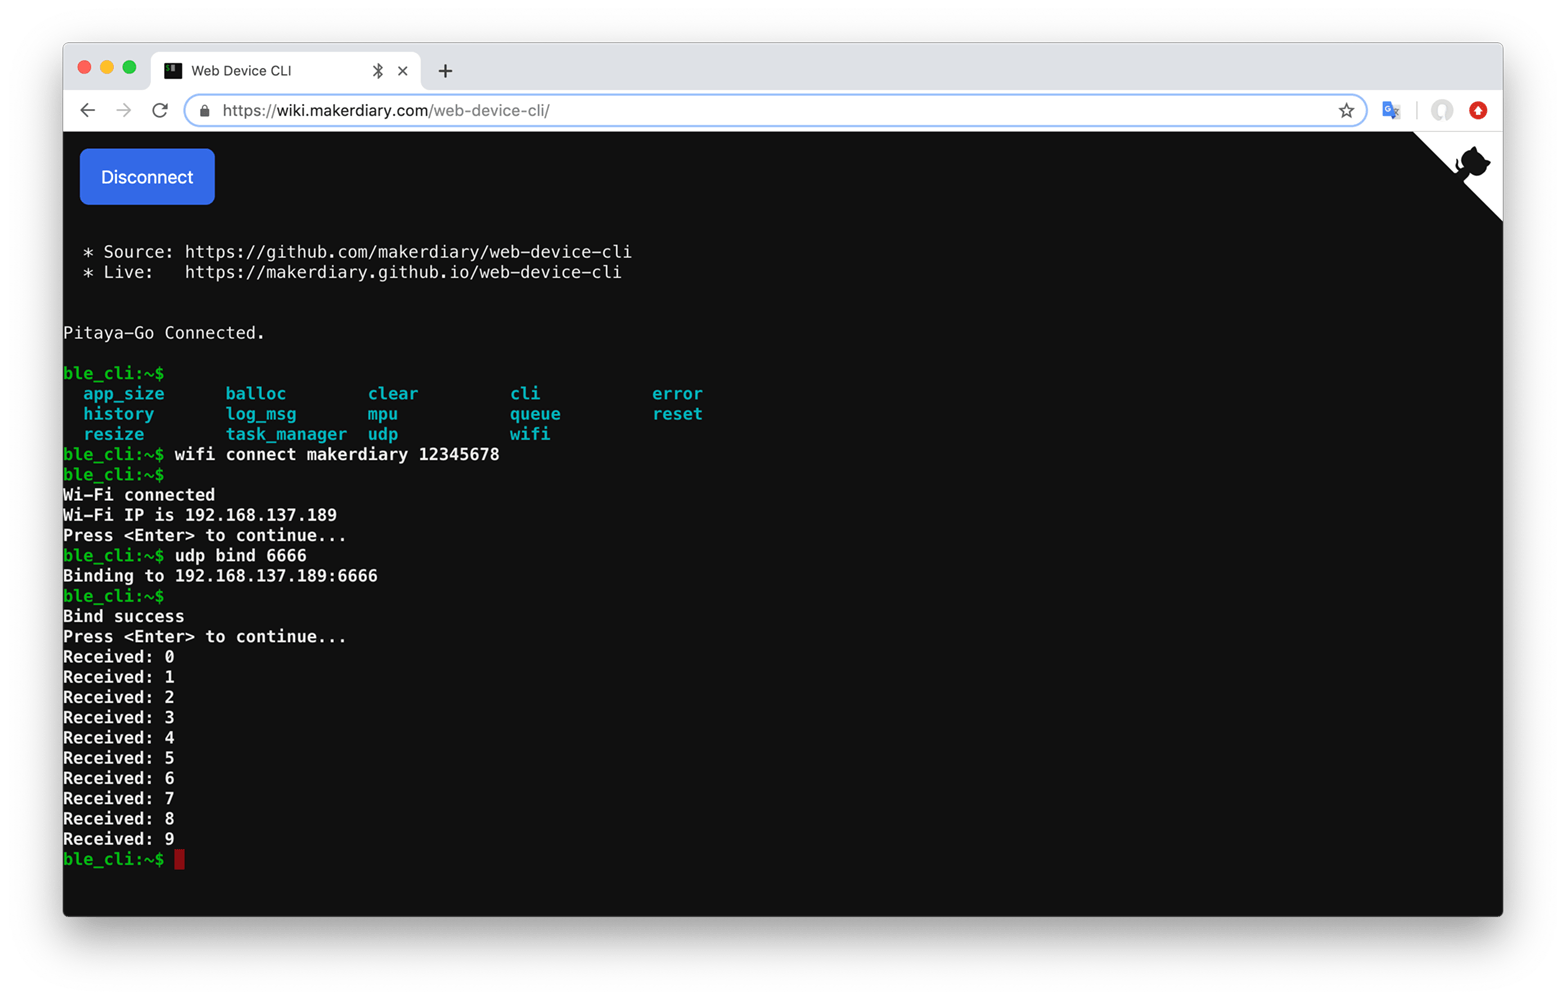
You can also use the Web Device CLI application to test this example.
Create an Issue
Interested in contributing to this project? Want to report a bug? Feel free to click here: